
The information here is intended to help painters and artists get the best results they can when painting realistic fire in unusual situations on their own projects. For detailed instructions on painting realistic fire, we recommend that you watch The Secrets of Airbrushing True Fire™ – Part 1 DVD.
In case you missed it, you can read True Fire™ Basics Part 1, “Know Your Fire,” on our website by clicking here.
For True Fire™ Basics Part 2, “What You Throw Down,” on our website, click here.
True Fire Basics Part 3, “Your Sword vs. Your Shield” can be found here.
 We’ve previously discussed (in Part 2) the best situations in which to paint realistic fire- the background colors that tend to work best, the placement of flames that will give you the most bang for your buck, etc. However, sometimes you are presented with a situation that is not ideal for painting True Fire™ at all.
-What do you do when you need to paint fire on a white car?
-What if the object you are painting doesn’t lend itself well to having flames on its surface, or has some areas that you have to avoid that throw a wrench into the flow of a good fire application?
Let’s take a look at what you can do about that…
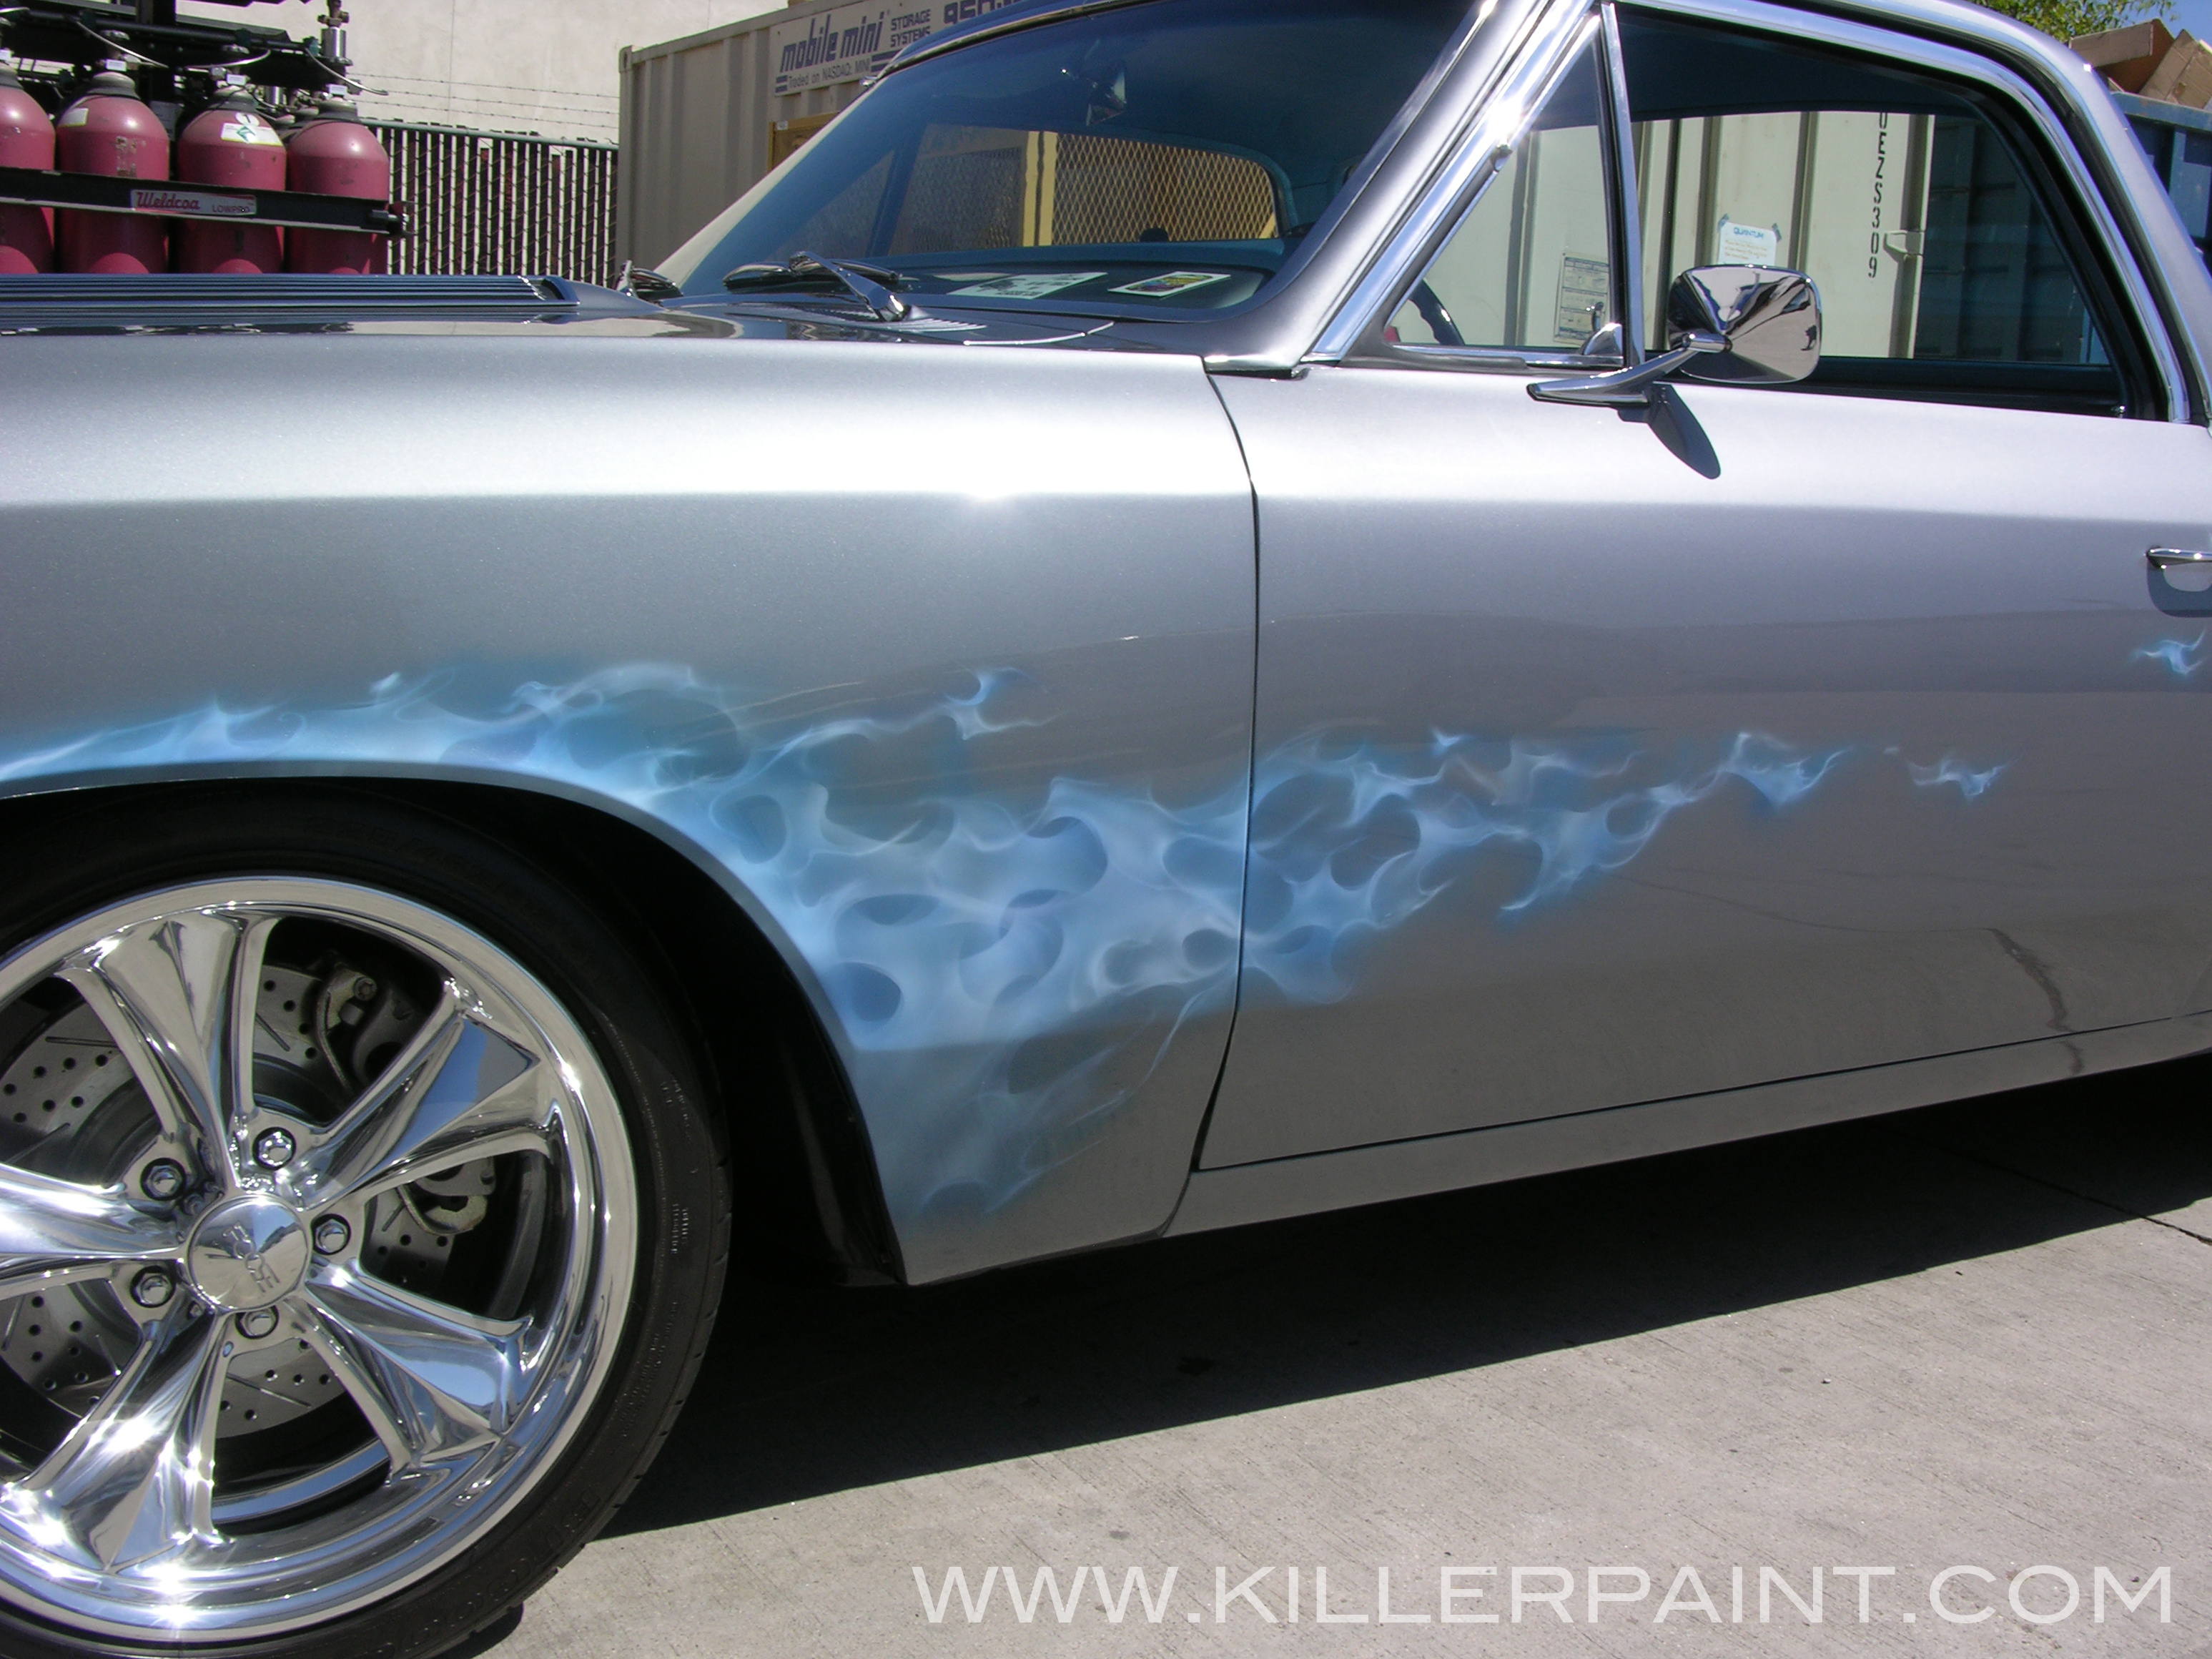
In this case, painting on silver requires doing extremely pale flames.
Dark to Light, Loose to Tight
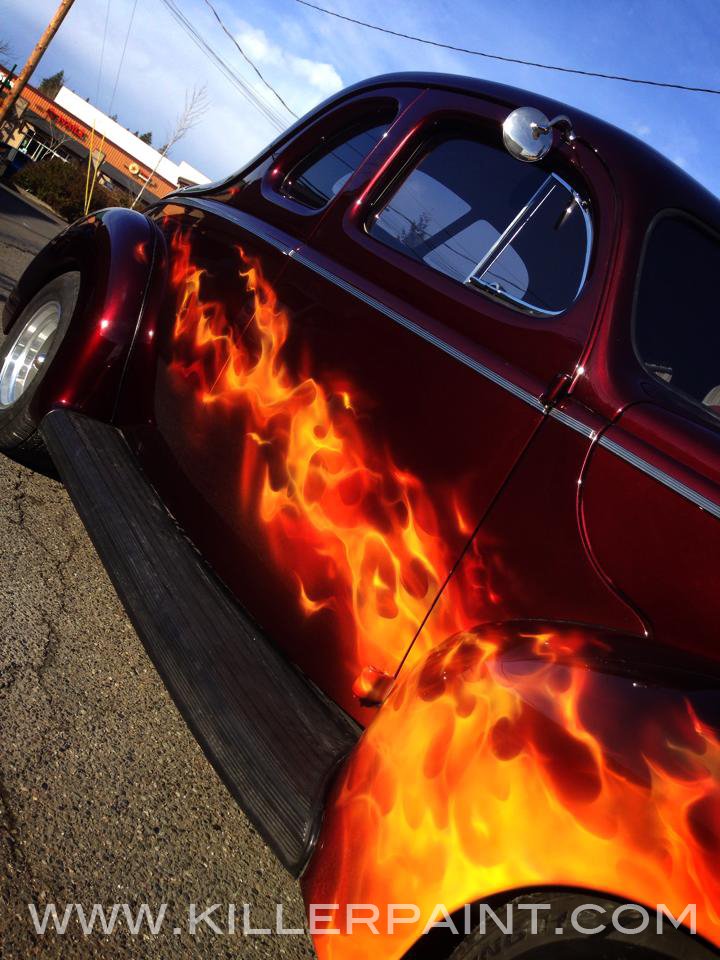
There is a reason that realistic flames work best on darker colors, and especially on black. When painting True Fire™, the goal is to make it look as much like real flames as possible.
First and foremost, fire glows. It is bright. Since paint does not, the way to make your flames appear luminescent is go for contrast- to paint brighter colors on a dark surface- use the difference to build the illusion.
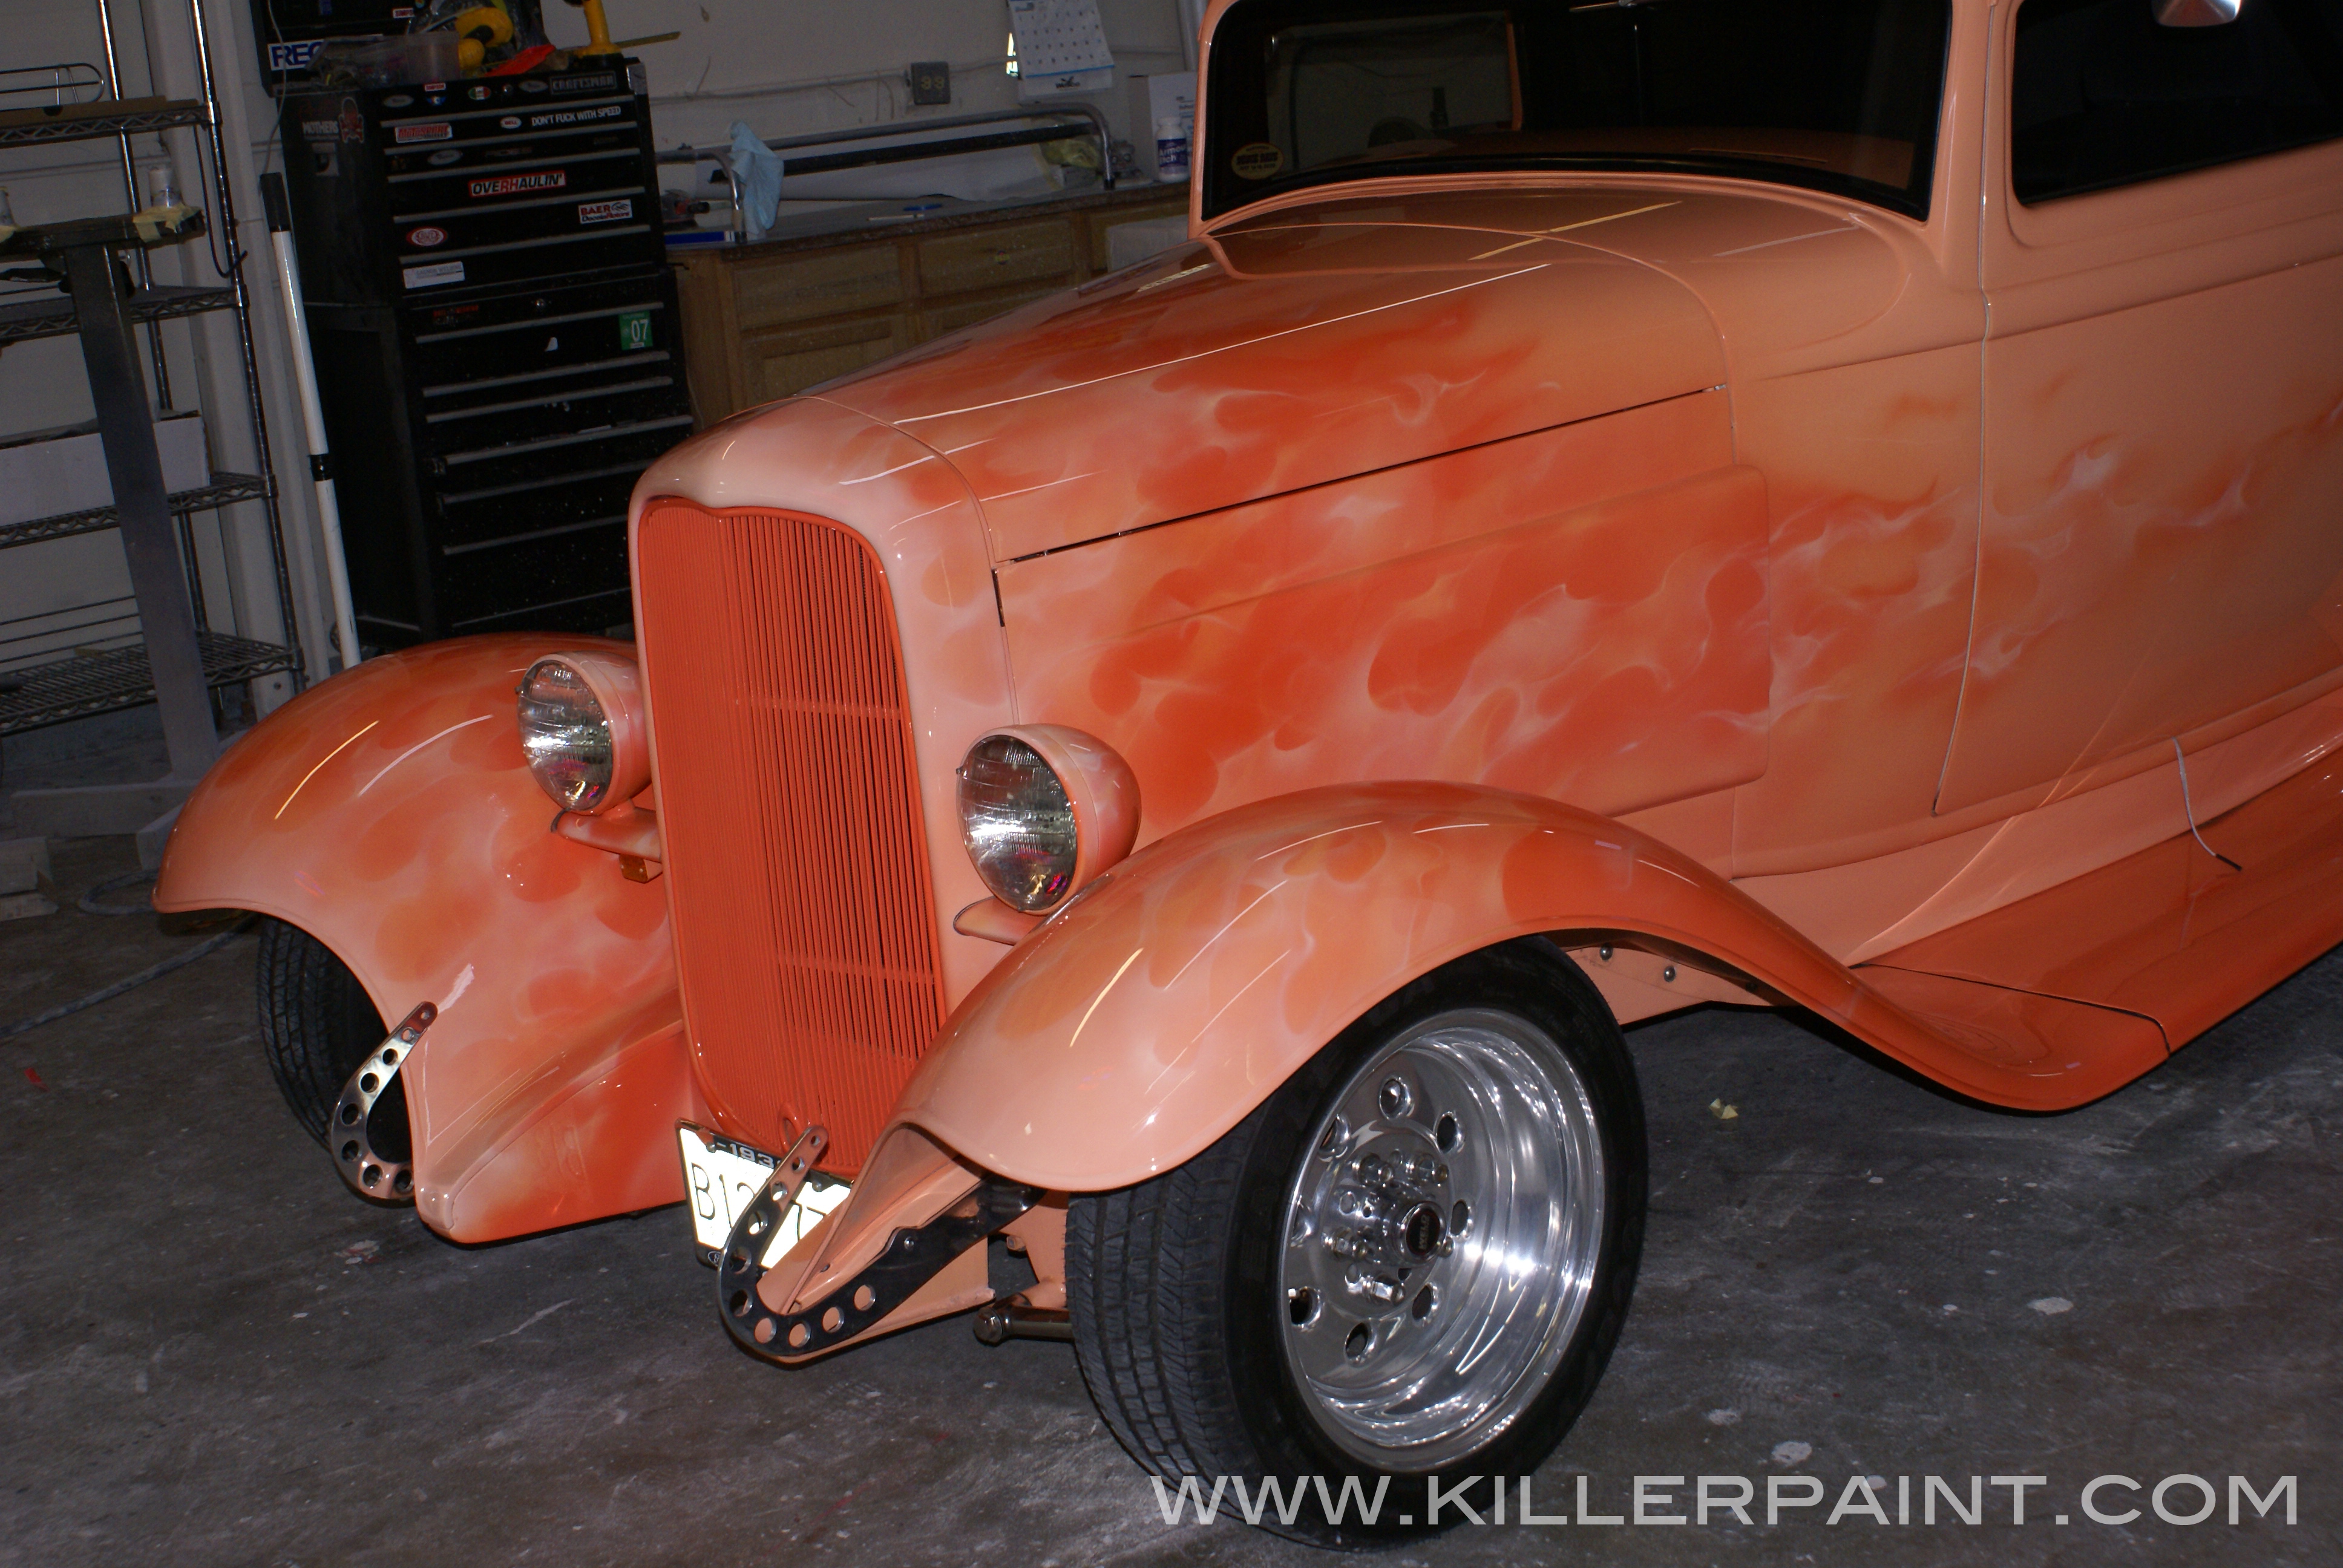
When painting fire on a light-colored surface though, the background robs the flames of much of their brightness, and they will be less vibrant.
And while it’s by no means an ideal scenario, flames can sometimes be painted successfully on some lighter colors (with a lot of finesse). Unfortunately, the result typically doesn’t have as much punch as it would if the background were darker as compared to the flames on it.
If you find yourself in a situation where you can’t avoid painting on an unfavorable surface, there are ways to turn the tables at least a little in your favor. Then your flames have a better chance to look their best.
Backshading your flames will help them stand out when they would otherwise be washed out by the base color.
Call in Your Own Backup
If the base color is as light (or lighter) than your flames, then one way around it is to basically cheat just a little, by laying down a darker color just behind your fire. One that your flames will look good on.
If you are painting flames of a similar color tone to your surface, then you can put down areas of deeper color roughly where your fire will lay out. Or, if it is acceptable for the job at hand, you can do a color fade over a broader area.
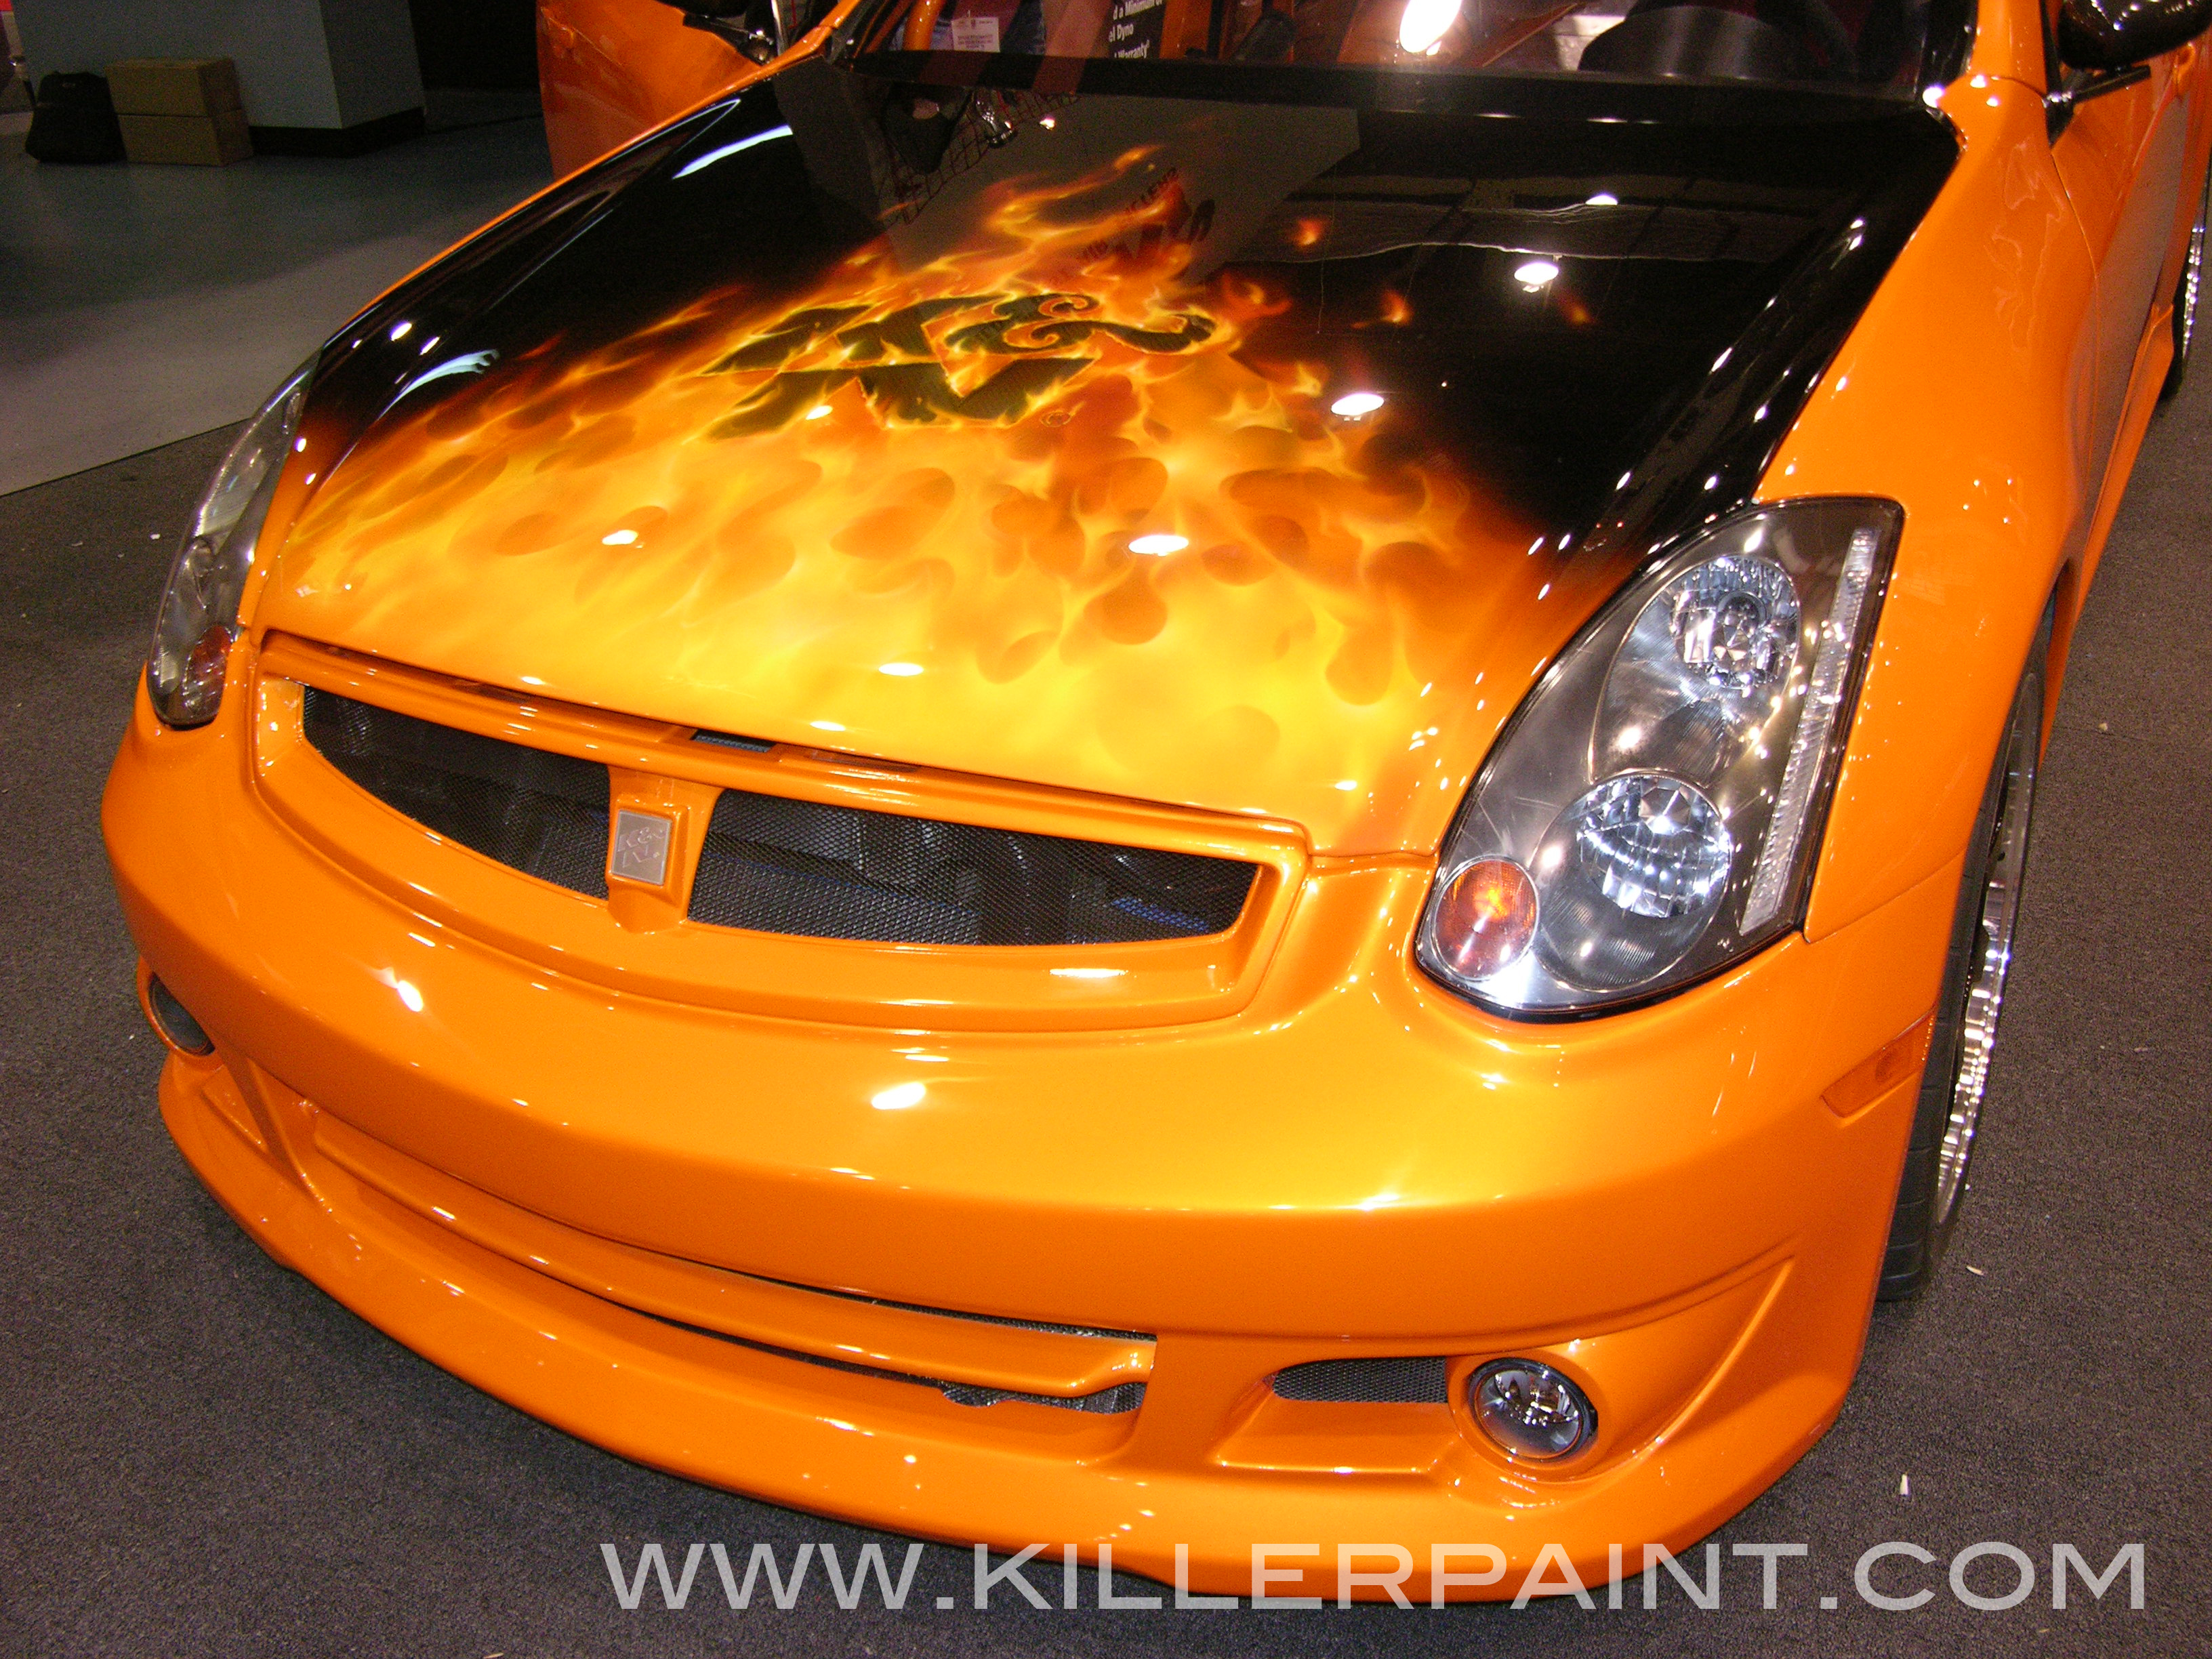
One variant method is to lay down cloudy areas of black, regardless of the base color. When done correctly, it can be made to look like dark clouds of smoke. This not only maintains plausibility, but provides maximum contrast for the flames.
Changing the base color on just part of a project can give you a step up.
Change the Tone of the Conversation
The most direct way to deal with a pesky base color is to change it to a more suitable color. Unfortunately, repainting a whole car is a lot of time and work. If it is a job for a customer, then they may not be up for something that expensive. However, changing the color in limited sections can sometimes be a feasible compromise.
Painting a two-tone section on a car is a good way to not only give your flames a better chance to stand out, but to add more interest to the paint job on the car overall.
Creating a section of more accommodating color gives you a well-defined area in which you know your flames can look good, and without having to change your painting technique to compensate for a weak background color.
(This approach can also be used even if the base color is already just fine for realistic fire, just to give the piece some added layers of complexity and impact.)
Know Where to Draw the Line(s)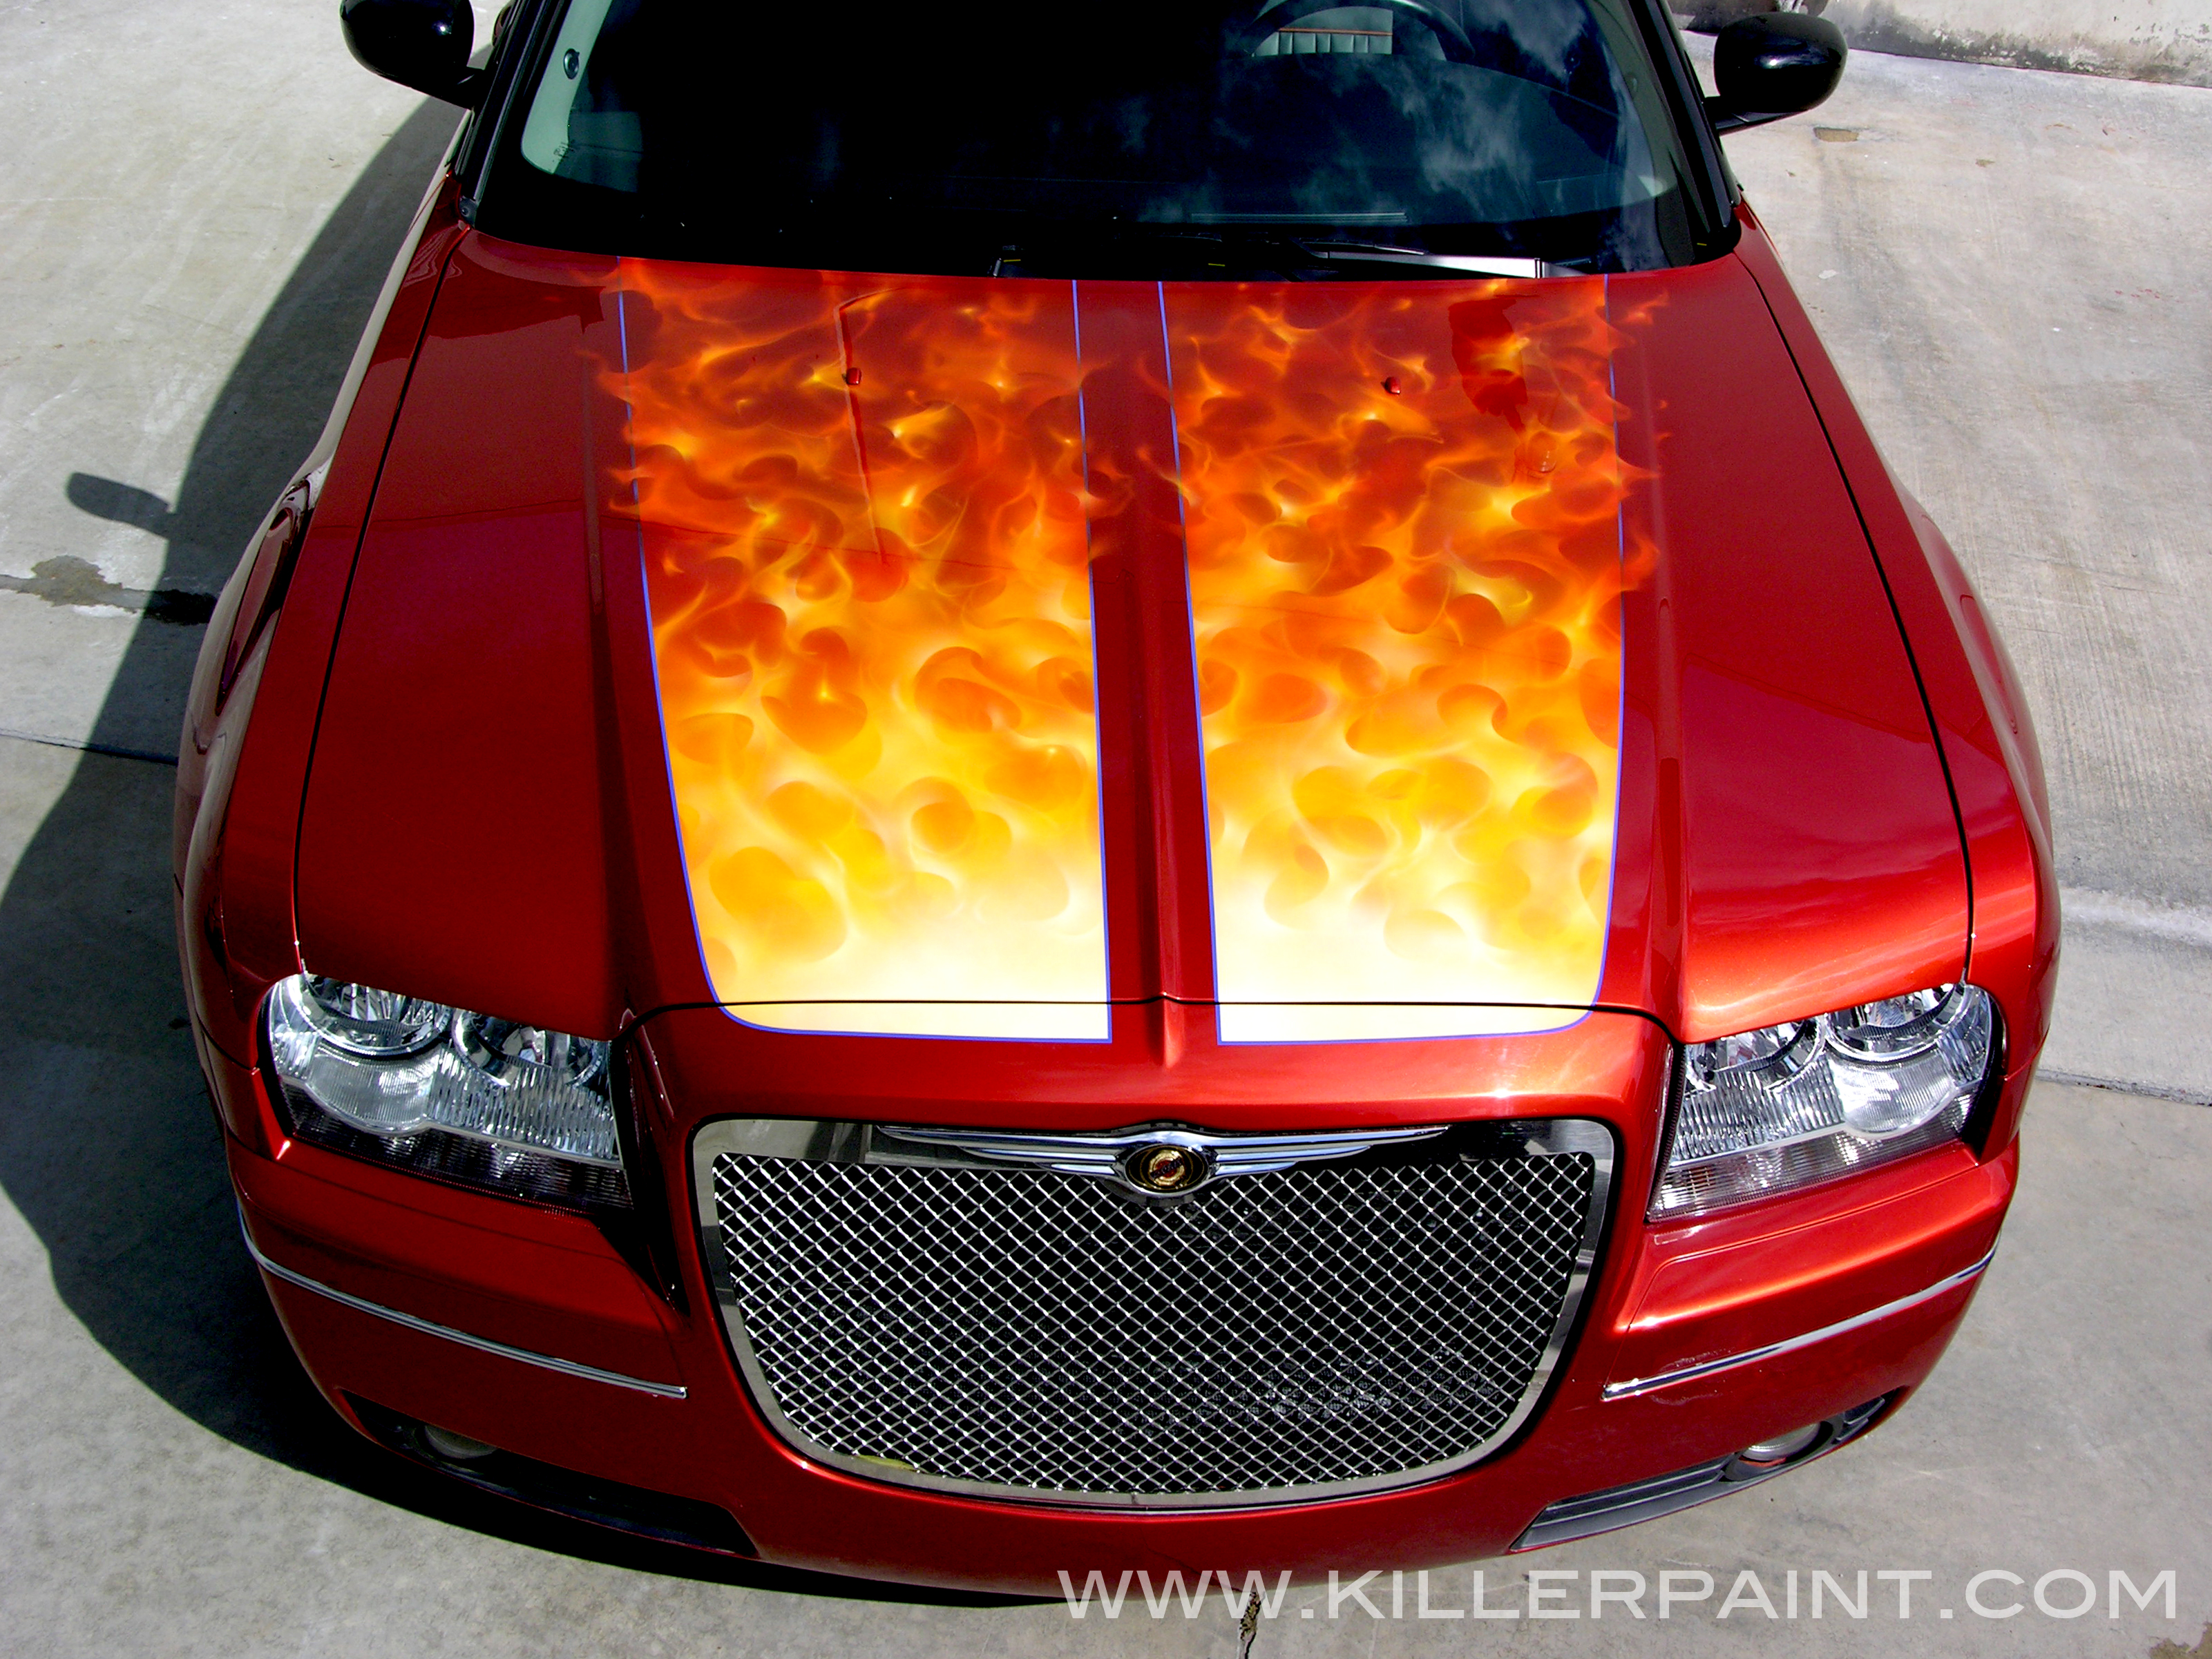
If doing a large two-tone color change is going to be too drastic for your project, then using the same approach in more manageable sizes is another path to consider.
Laying down stripes of an appropriate color to paint your fire on is a relatively painless alternative to larger base color changes. You can use simple, well-liked designs, like rally stripes on cars for instance, as a canvas for your flames. Then, even somewhat conservative customers are more likely to embrace the result.
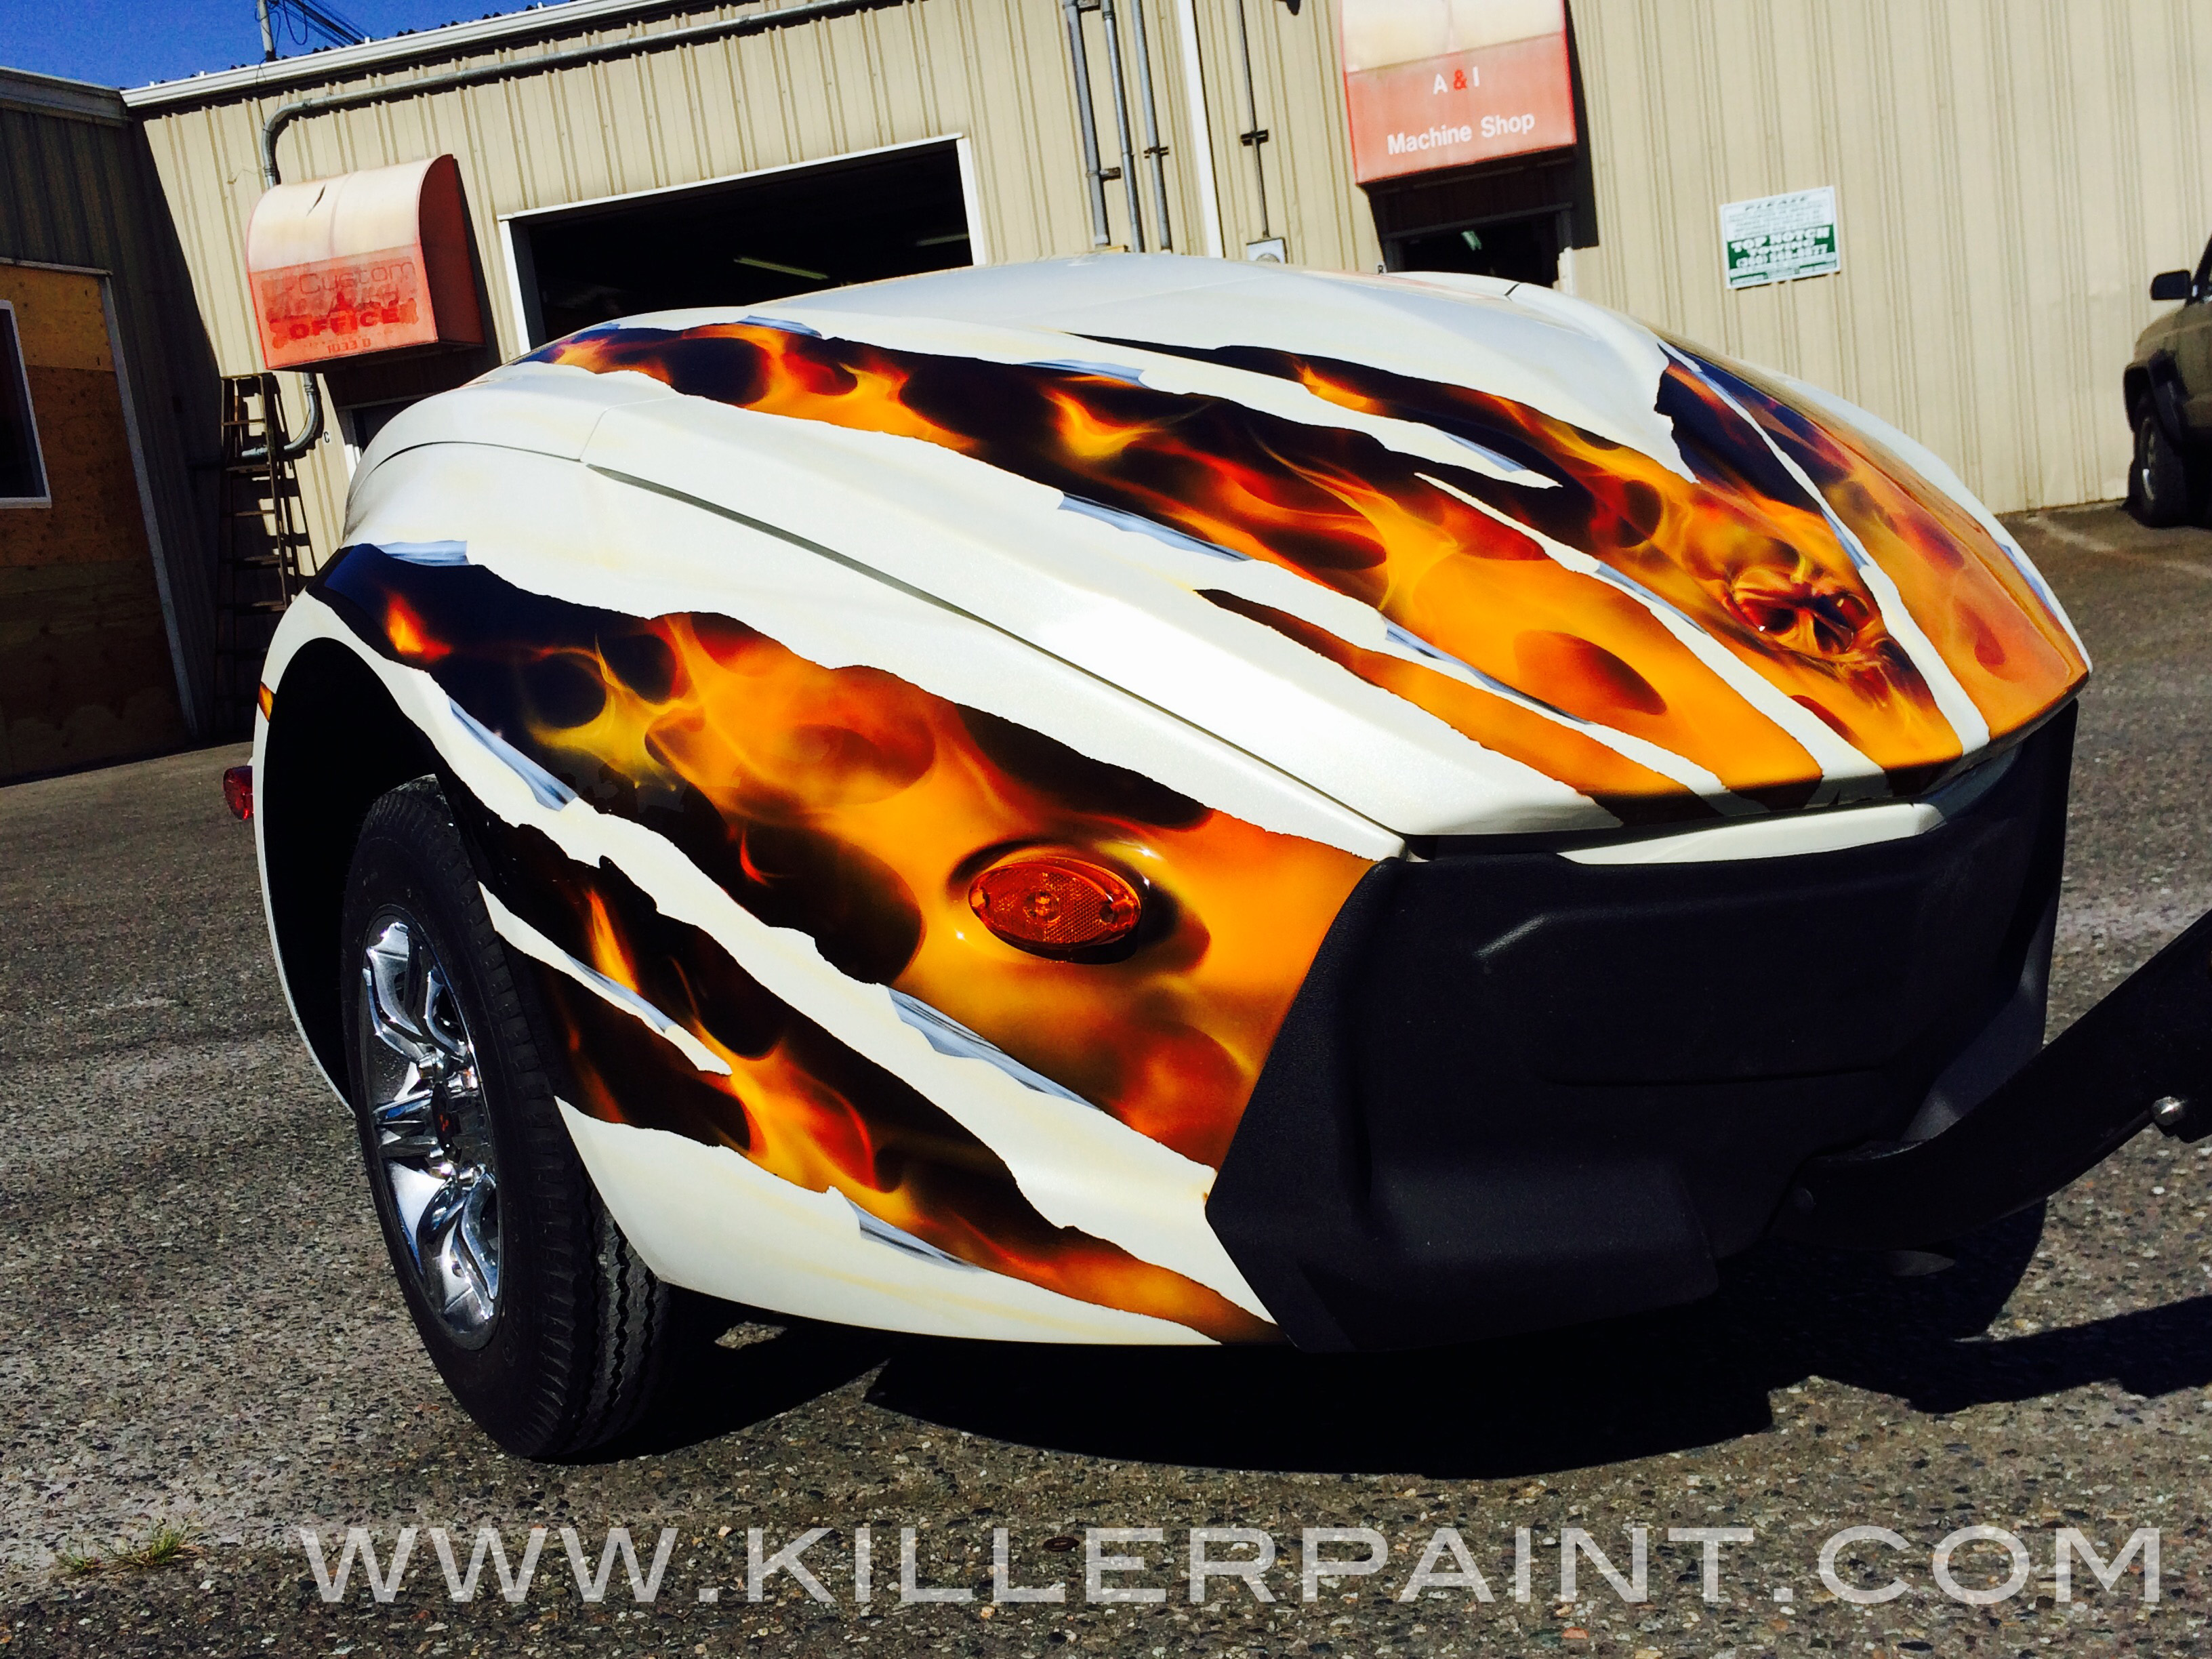 Carve Yourself Some Space
If you are feeling relatively ambitious, then a more creative way to give yourself some favorable painting areas on a project is to section off areas with more creative designs than just simple stripes or bands of color. Different designs, shapes, or even emblems can be used to create a “window” where your fire can live.
One popular method at Killer Paint is to reveal sections of black by making them appear to be exposed by the “tearing away” the original base color, and making the edges look like shreds of material.
This approach gives a painter a lot of options, as one can vary the amount of surface area that is painted the new color. You can use just a few modest shreds as accents, or go all the way, and have large swathes of area exposed and painted your new color. Strategic placement of your paint spaces can also help you avoid awkward or unpaintable areas on a project as well.
Also, the quantity of fire in the “torn away” areas can be adjusted to suit the projects needs very easily as well… and you needn’t limit yourself to painting only fire in those spaces. There are numerous possibilities to take advantage of, using this approach.
We hope you found this information useful. We may have posts about airbrush art and painting True Fire™ in the future, so stay tuned! Thanks for visiting!
Click the corresponding link if you are interested in purchasing The Secrets of Airbrushing True Fire™ – Part 1and The Secrets of Airbrushing True Fire™ – Part 2
Artool’s True Fire™ Freehand Templates, used in painting realistic fire, can be purchased from Coast Airbrush here, and the “2nd Degree Burn” templates are here.

Let us know in the comments if you have any questions about reference materials for painting realistic fire, or share with us your favorite ways to gather images for inspiration in creating your artwork.
If you would like to contact Killer Paint about working on your project, visit our website, or contact us at info@killerpaint.com
Related Links:
True Fire™ Basics Part 1, “Know Your Fire”: https://www.killerpaint.com/true-firetrade-basics/category/basics-part-1
True Fire™ Basics Part 2, “What You Throw Down”: https://www.killerpaint.com/true-firetrade-basics/category/basics-part-2
True Fire™ Basics Part 3, “Your Sword vs Your Shield”: https://www.killerpaint.com/true-firetrade-basics/category/basics-part-3
The Original Killer Paint Facebook Page: https://www.facebook.com/pages/THE-Original-KILLER-PAINT-INC/297040465604
The Killer Paint Website: www.killerpaint.com
True Fire™ Instructional DVDs:
The Secrets of Airbrushing True Fire™ – Part 1
The Secrets of Airbrushing True Fire™ – Part 2
True Fire™ Freehand Templates: Artool Freehand Airbrush Templates, True Fire Template Set
House of Kolor Official Website: http://www.houseofkolor.com/
