Category: Cars


IMG_2888b

Enter a caption

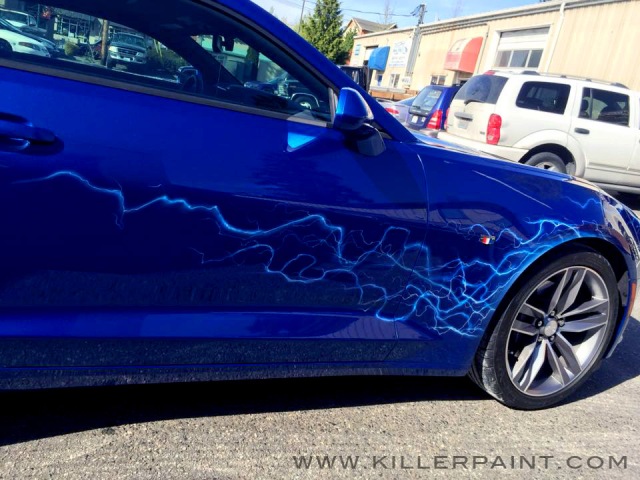
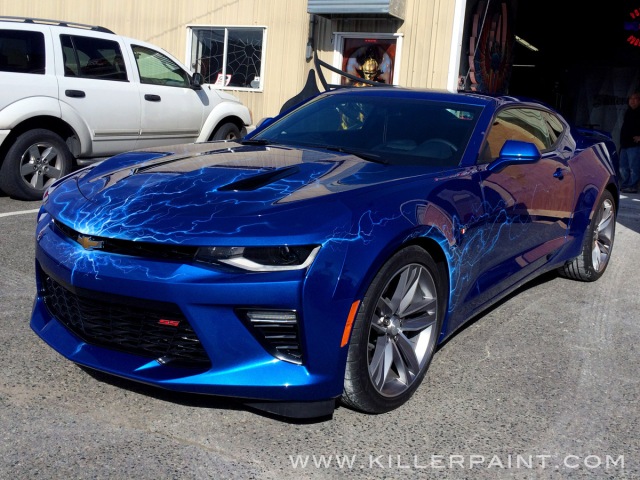
This 2016 Camaro was brought to us by our customer Aubrey P., who wanted an electrifying look for her brand new car…


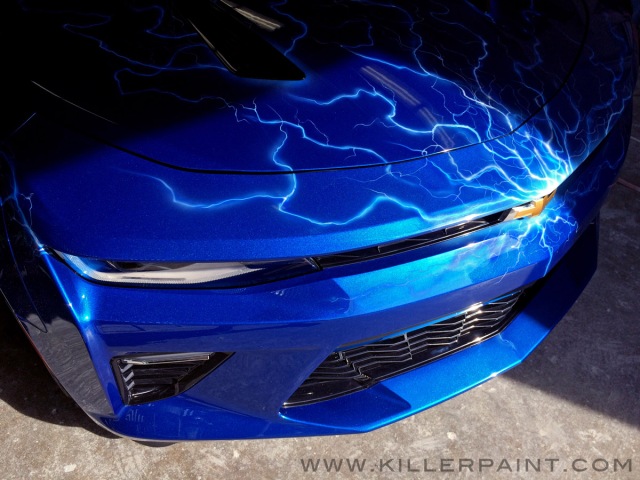
The Camaro Hyper Blue Metallic paint color is already pretty high voltage, so the artwork was painted right over the stock color.

12990897_10153970408140605_5609254280084409064_n2


Bolts of lightning run across the hood, emanating from the Chevrolet bowtie emblem on the front, radiating outward. Even more electrical arcs flow off the backs of the wheel wells and down the doors, as well as a bit from the corners of each of the headlights.


On the back, the bowtie on the trunk lid was also hit by the lightning bug, and a “Phoenix” text emblem was designed to go on the rear at the customer’s request.

IMG_2900b


This kind of  a simple though effective way to give a paint job some extra “wow” factor, without being terribly ostentatious.

We hope you enjoyed seeing this project.  Let us know if there is anything you would like to see us post here in the future!


ShinyDimemsionalSpadeSkull

Maybe this project gave you some ideas, or you already have an idea in mind for your own car, truck, motorcycle, refrigerator, etc?

If you would like to contact Killer Paint about working on your own project, visit our website, or contact us at info@killerpaint.com


Related Links:

The Original Killer Paint Facebook Page: https://www.facebook.com/pages/THE-Original-KILLER-PAINT-INC/297040465604

The Official Killer Paint Website: www.killerpaint.com

Killer Paint videos on YouTube

Killer Paint’s “True Fire™ Basics” Blog Series: https://www.killerpaint.com/true-firetrade-basics

Killer Grunge FX™ Spray at Coast Airbrush: https://www.coastairbrush.com/products.asp?cat=789

Grunge FX™ Tutorial Video on Youtube: https://www.youtube.com/watch?v=96hjkbrwprA

True Fire™ Instructional DVDs:
The Secrets of Airbrushing True Fire™ – Part 1
The Secrets of Airbrushing True Fire™ – Part 2

True Fire™ Freehand Templates: Artool Freehand Airbrush Templates, True Fire Template Set

House of Kolor Official Website: www.houseofkolor.com -The preferred paint of Mike Lavallee & Killer Paint

IMG_2515c

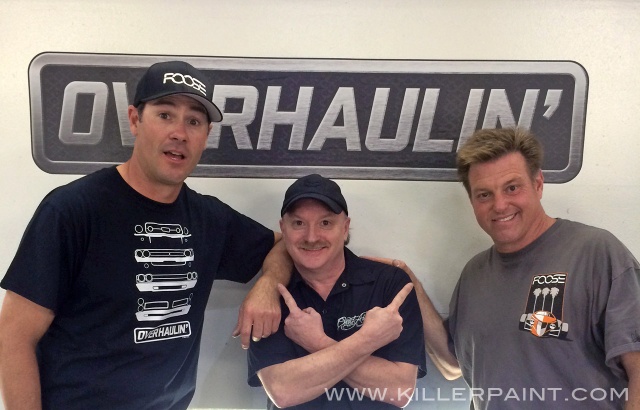
Recently, the final episode of Overhaulin’ titled “Foose and the Bandit” aired on the Velocity Channel. Mike was called in to do his magic on the project, though he didn’t know it would be his last appearance on the show at the time… Continue reading

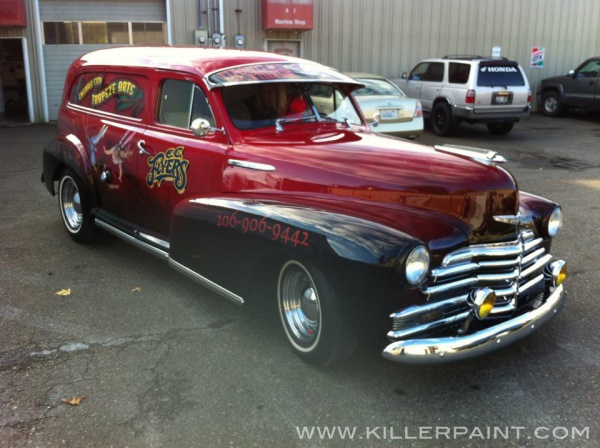
Most of the jobs that come to Killer Paint are for people’s personal cars, trucks, motorcycles and so on. However, businesses also bring us vehicles for custom paint as well. While there are cheaper signage/display options for vehicles, there are benefits to having paint on a company vehicle.

Stand Out in the Crowd-

Emerald City Trapeze Car by Mike Lavallee of Killer Paint

Custom painted artwork is highly useful where standout visibility for the company is desired. A nicely done vehicle will be a real head-turner as well. Many companies take advantage of that kind of attention draw to make sure that their business is seen. With a really knockout paint job, you are not only seen, but remembered.


Show up (at) the Competition-

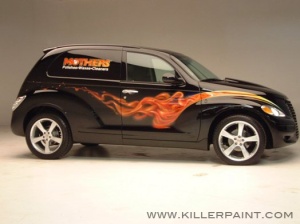
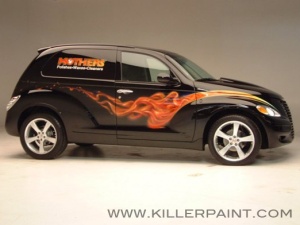
Mothers Wax PT Cruiser Painted by Mike Lavallee of Killer PaintSome companies chose to invest in a special car, truck or motorcycle to use as a show vehicle.

Custom artwork is often highly desired for a business show car, because the first thing a person sees on a vehicle is the paint- it gets the maximum number of eyes pointed in the right direction, and keep them there longer.

Sometimes a car or truck will feature equipment or parts that are sold, manufactured or installed by the company.

Other businesses might simply use the vehicle to draw notice by having an attention-grabbing car with their name on it. Then all that is needed is to get it out in front of people and make sure it gets seen.

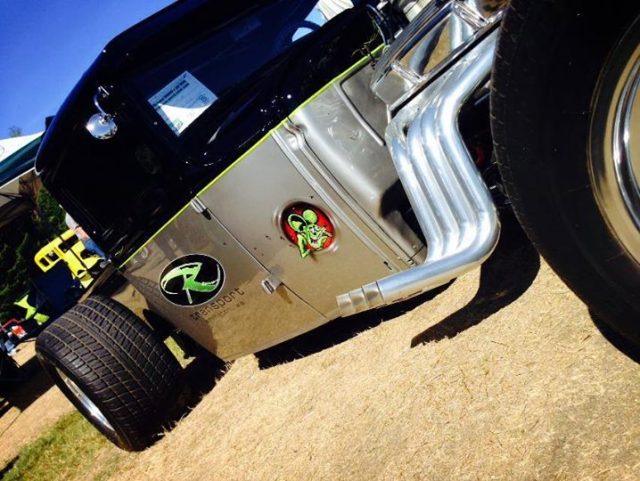
Rock Pizza 1934 Ford Coupe by Mike Lavallee of Killer PaintSuch a vehicle will often be taken to car shows, conventions, or any event where there is sure to be a large crowd, in order to get maximum exposure. (Having a car win an trophy or two doesn’t hurt either.)

Some show cars, trucks or motorcycles will even do one or more show tours, making appearances at a number of special locations, promotional events or even charity fundraisers.

A really nicely done show vehicle can potentially continue to draw attention to the business for a number of years with the right amount of exposure. The right kind of show car could even possibly gain its own reputation and build its own fan base.


The flipside of this coin is putting a private vehicle to work in order to advertise one’s business.

Sometimes an owner of a company will have a vehicle of their own that they want to get custom artwork painted on, and take the opportunity to draw attention to their business at the same time.

10616215_10152677306505605_5142820078616664119_nSome Killer Paint customers choose to include their company name or logo with the artwork, while they are already having their vehicle painted for their own personal enjoyment. That way, their business name goes out with them wherever they take it.


Tough Enough-

When it comes to work vehicles that see a lot of use, or might get a lot of wear and tear from heavy duty kinds of work, many businesses are reluctant to have high-quality custom paint done.

TRUE FIRE JOB (137)BThe paint on a workhorse vehicle can take a serious beating just from simply being driven often, from things like rock chips, minor scratches, door dings and other little hazards of the road.

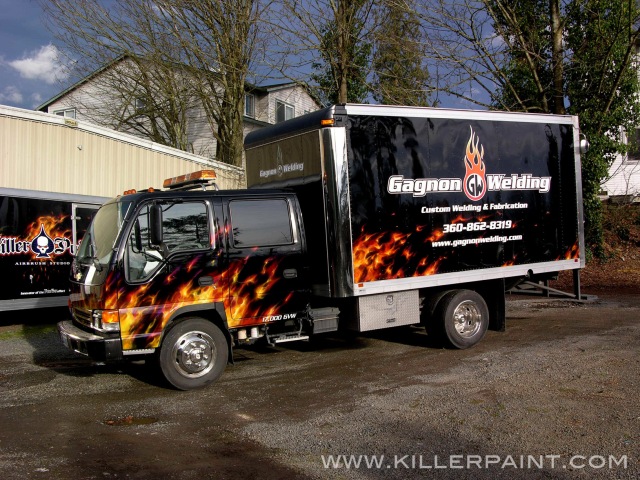
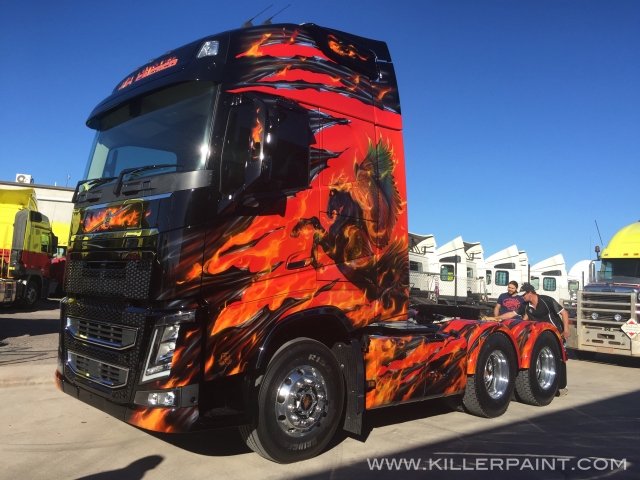
Dump Truck with True Fire™ Paint Job by Mike Lavallee of Killer PaintFor vehicles like dump trucks, tow trucks or box vans, the amount of wear or abuse that one of these beasts is likely to endure is much greater.

Despite this, plenty of customer businesses have still decided to have custom paint done for such vehicles. There are a few reasons why a company decides to go with custom paint on a hard-working truck or other vehicle…

Some companies, especially one-man operations, might only have a single workhorse vehicle in use, and they are often very invested in it. As such, they feel it is worth the effort it to make it look special, too.

Smaller operations will usually have a smaller staff or crew, and can more easily focus responsibility on making sure proper care is taken in using a custom painted vehicle to minimize wear or damage while in use and on the job.

On the other hand, a business that has a larger fleet of heavy duty vehicles in use will sometimes choose to have one of their trucks receive a special paint job as a figurehead vehicle, and get custom paint for it as part of their advertising budget.

1D2BADAF-7079-4C6E-9001-39CAA000179B-2Sometimes such a vehicle might be designated primarily for public appearances like parades, or parked prominently where it can be seen by a lot of passing traffic, either at the business’s main location or at an active job site.

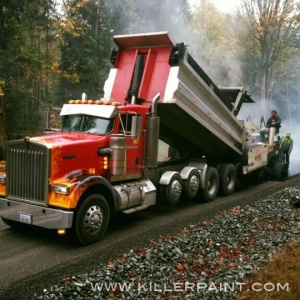
Semi Truck with Green True Fire™ by Mike Lavallee of Killer PaintWith a larger pool of vehicles in operation, it might be taken out only when needed for lighter jobs, and it can be assigned to a driver or operator that has demonstrated a high degree of responsibility in caring for equipment.

Additionally, a vehicle this eye-catching is a perfect element to feature in a company’s advertising media.

Images of the car or truck can be posted on the front page of a company’s website or social media pages, as well as used in traditional print ads or even television commercials.

The right custom painted vehicle can act almost like a spokesperson for a company. It gets people’s attention, can make a bold statement about a business, and make people remember it.


ShinyDimemsionalSpadeSkull

Maybe this post gave you some ideas, or you already have an idea in mind for your own car, truck, motorcycle, refrigerator, etc?

If you would like to contact Killer Paint about working on your own project, visit our website, or contact us at info@killerpaint.com


Related Links:

The Original Killer Paint Facebook Page: https://www.facebook.com/pages/THE-Original-KILLER-PAINT-INC/297040465604

The Official Killer Paint Website: www.killerpaint.com

Killer Paint’s “True Fire™ Basics” Blog Series: https://www.killerpaint.com/true-firetrade-basics

True Fire™ Instructional DVDs:
The Secrets of Airbrushing True Fire™ – Part 1
The Secrets of Airbrushing True Fire™ – Part 2

True Fire™ Freehand Templates: Artool Freehand Airbrush Templates, True Fire Template Set

House of Kolor Official Website: www.houseofkolor.com

The information here is intended to help painters and artists get the best results they can when painting realistic fire in unusual situations on their own projects. For detailed instructions on painting realistic fire, we recommend that you watch The Secrets of Airbrushing True Fire™ – Part 1 DVD.

In case you missed it, you can read True Fire™ Basics Part 1, “Know Your Fire,” on our website by clicking here.

For True Fire™ Basics Part 2, “What You Throw Down,” on our website, click here.

True Fire Basics Part 3, “Your Sword vs. Your Shield” can be found here.
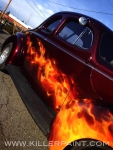


1623420_10152230157120605_346570136_n2We’ve previously discussed (in Part 2) the best situations in which to paint realistic fire- the background colors that tend to work best, the placement of flames that will give you the most bang for your buck, etc. However, sometimes you are presented with a situation that is not ideal for painting True Fire™ at all.

-What do you do when you need to paint fire on a white car?

-What if the object you are painting doesn’t lend itself well to having flames on its surface, or has some areas that you have to avoid that throw a wrench into the flow of a good fire application?

Let’s take a look at what you can do about that…

DSCN0043B

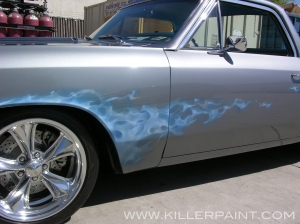
In this case, painting on silver requires doing extremely pale flames.

Dark to Light, Loose to Tight

There is a reason that realistic flames work best on darker colors, and especially on black. When painting True Fire™, the goal is to make it look as much like real flames as possible.

First and foremost, fire glows. It is bright. Since paint does not, the way to make your flames appear luminescent is go for contrast- to paint brighter colors on a dark surface- use the difference to build the illusion.

When painting fire on a light-colored surface though, the background robs the flames of much of their brightness, and they will be less vibrant.

And while it’s by no means an ideal scenario, flames can sometimes be painted successfully on some lighter colors (with a lot of finesse). Unfortunately, the result typically doesn’t have as much punch as it would if the background were darker as compared to the flames on it.

If you find yourself in a situation where you can’t avoid painting on an unfavorable surface, there are ways to turn the tables at least a little in your favor. Then your flames have a better chance to look their best.


Backshading your flames will help them stand out when they would otherwise be washed out by the base color.

Call in Your Own Backup

If the base color is as light (or lighter) than your flames, then one way around it is to basically cheat just a little, by laying down a darker color just behind your fire. One that your flames will look good on.

If you are painting flames of a similar color tone to your surface, then you can put down areas of deeper color roughly where your fire will lay out. Or, if it is acceptable for the job at hand, you can do a color fade over a broader area.

One variant method is to lay down cloudy areas of black, regardless of the base color. When done correctly, it can be made to look like dark clouds of smoke. This not only maintains plausibility, but provides maximum contrast for the flames.

DSCN0090B

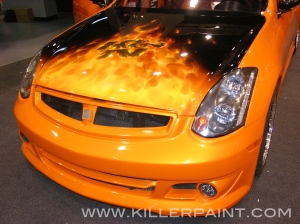
Changing the base color on just part of a project can give you a step up.

Change the Tone of the Conversation

The most direct way to deal with a pesky base color is to change it to a more suitable color. Unfortunately, repainting a whole car is a lot of time and work. If it is a job for a customer, then they may not be up for something that expensive. However, changing the color in limited sections can sometimes be a feasible compromise.

Painting a two-tone section on a car is a good way to not only give your flames a better chance to stand out, but to add more interest to the paint job on the car overall.

Creating a section of more accommodating color gives you a well-defined area in which you know your flames can look good, and without having to change your painting technique to compensate for a weak background color.

(This approach can also be used even if the base color is already just fine for realistic fire, just to give the piece some added layers of complexity and impact.)


Know Where to Draw the Line(s)TRUE FIRE JOB (6)B
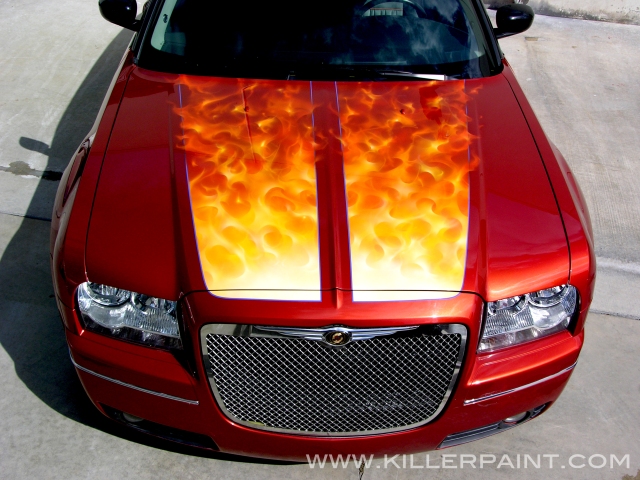
If doing a large two-tone color change is going to be too drastic for your project, then using the same approach in more manageable sizes is another path to consider.

Laying down stripes of an appropriate color to paint your fire on is a relatively painless alternative to larger base color changes. You can use simple, well-liked designs, like rally stripes on cars for instance, as a canvas for your flames. Then, even somewhat conservative customers are more likely to embrace the result.
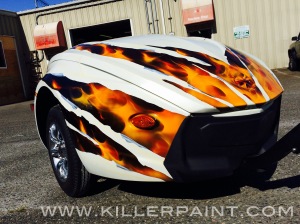

FullSizeRender-8BCarve Yourself Some Space

If you are feeling relatively ambitious, then a more creative way to give yourself some favorable painting areas on a project is to section off areas with more creative designs than just simple stripes or bands of color. Different designs, shapes, or even emblems can be used to create a “window” where your fire can live.

One popular method at Killer Paint is to reveal sections of black by making them appear to be exposed by the “tearing away” the original base color, and making the edges look like shreds of material.

This approach gives a painter a lot of options, as one can vary the amount of surface area that is painted the new color. You can use just a few modest shreds as accents, or go all the way, and have large swathes of area exposed and painted your new color. Strategic placement of your paint spaces can also help you avoid awkward or unpaintable areas on a project as well.

Also, the quantity of fire in the “torn away” areas can be adjusted to suit the projects needs very easily as well… and you needn’t limit yourself to painting only fire in those spaces. There are numerous possibilities to take advantage of, using this approach.

We hope you found this information useful. We may have posts about airbrush art and painting True Fire™ in the future, so stay tuned! Thanks for visiting!

Click the corresponding link if you are interested in purchasing The Secrets of Airbrushing True Fire™ – Part 1and The Secrets of Airbrushing True Fire™ – Part 2

Artool’s True Fire™ Freehand Templates, used in painting realistic fire, can be purchased from Coast Airbrush here, and the “2nd Degree Burn” templates are here.


ShinyDimemsionalSpadeSkull

Let us know in the comments if you have any questions about reference materials for painting realistic fire, or share with us your favorite ways to gather images for inspiration in creating your artwork.

If you would like to contact Killer Paint about working on your project, visit our website, or contact us at info@killerpaint.com


Related Links:

True Fire™ Basics Part 1, “Know Your Fire”: https://www.killerpaint.com/true-firetrade-basics/category/basics-part-1

True Fire™ Basics Part 2, “What You Throw Down”: https://www.killerpaint.com/true-firetrade-basics/category/basics-part-2

True Fire™ Basics Part 3, “Your Sword vs Your Shield”: https://www.killerpaint.com/true-firetrade-basics/category/basics-part-3

The Original Killer Paint Facebook Page: https://www.facebook.com/pages/THE-Original-KILLER-PAINT-INC/297040465604

The Killer Paint Website: www.killerpaint.com

True Fire™ Instructional DVDs:
The Secrets of Airbrushing True Fire™ – Part 1
The Secrets of Airbrushing True Fire™ – Part 2

True Fire™ Freehand Templates: Artool Freehand Airbrush Templates, True Fire Template Set

House of Kolor Official Website: http://www.houseofkolor.com/

At the Killer Paint shop, you’ll find plenty of artwork and decorations all over, from the front room to the bathroom. One set of pieces that are on display around the shop are some of the illustration renderings of cars done by some big names.

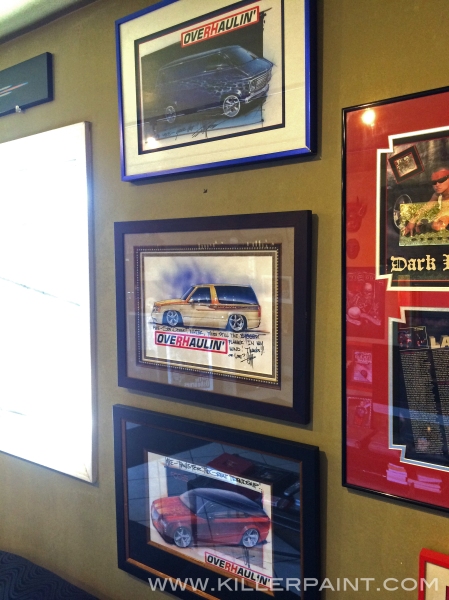
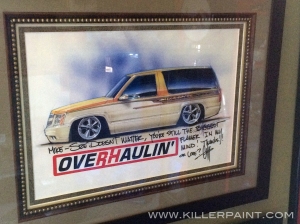
Chip Foose Project Renderings on Display at Killer PaintIn the front entry room of the shop, three such pieces signed by Chip Foose hang on the wall by the window. These three are all projects from episodes of Overhaulin’ that Mike appeared in.


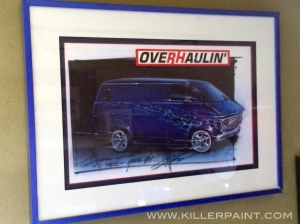
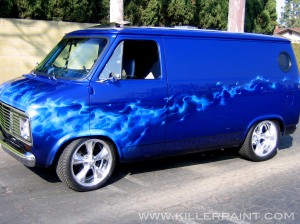
Blue True Fire van rendering for Overhaulin by Chip Foose Blue True Fire Chevy Van by Mike Lavallee of Killer Paint for Overhaulin with Chip Foose

This piece is from Season 3 episode 17 of Overhaulin’, “That 70’s Van” where Mike gave this Chevy van the True Blue fire treatment, including a fire-breathing dragon on the back.


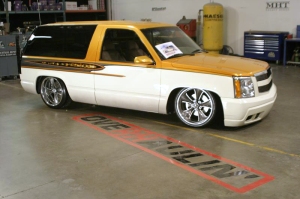
Chevy Tahoe rendering for < by Chip FooseChevy Tahoe, with True Fire stripe by Mike Lavallee of Killer Paint for Overhaulin with Chip Foose

This Chevy Tahoe got its makeover in season 4, episode 4 of Overhaulin’“Bling!” Mike’s flames appear in the black stripe down the sides of this truck.


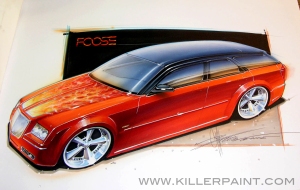
Dodge Mgnum rendering for Overhaulin by Chip Foose the magnum finishedB

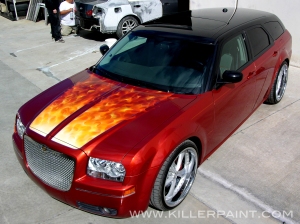
This Dodge Magnum appeared in episode 12 of season 3 of Overhaulin’“Fiery Brit”. Rally stripes engulfed in True Fire™ run up the hood and re-appear on the back end of this project car.


 CNN Hummer roof Art rendering for Overhaulin by Chip Foose Overhaulin crew with Mike Lavallee and Chip Foose for CNN Hummer project

The bathroom, of all the places in the shop, is probably the most interesting in terms of decor, artwork and assorted memorabilia at Killer Paint.

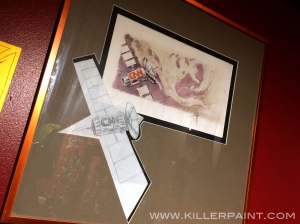
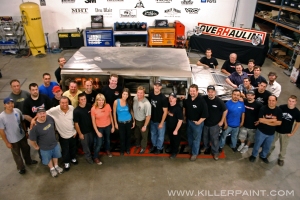
We’ll cover it in its entirety at a later date, but on the bathroom wall, there is another rarely seen Foose mockup, from the special CNN Hummer project on Overhaulin’ from season 5. This particular design was designated for the roof of the vehicle. The finished version can be seen in the photo above.


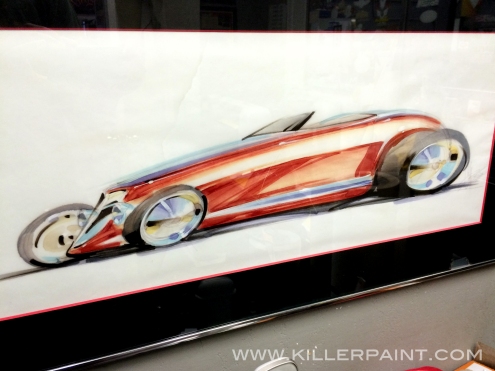
Hot rod rendering artwork by Chip FooseAnother Chip Foose original hangs on the wall in the office just below Mike’s legendary Hellion painting, the lion with the fiery mane that helped launch True Fire™ into the mainstream.


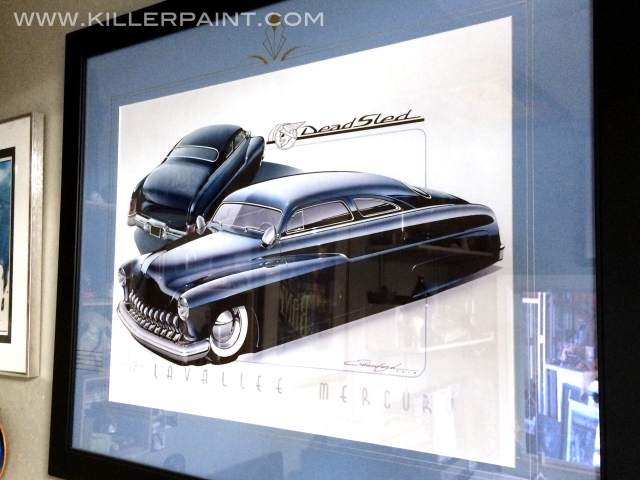
1951 Mercury concept art rendering by Steve Stanford for Mike Lavalllee of Killer Paint

The most recent addition to to the Killer Paint collection is very special. Mike has been working on getting his 1951 Mercury, dubbed “The Dead Sled,” completed for a while now. (At the time of this posting, it is down in South Los Angeles, in the hands of body modders Lordz of Customz, getting an extreme low, aggressive chop.)

Meanwhile, vehicle art legend Steve Stanford agreed to do a rendering of Mike’s Dead Sled as it will appear when completed, according to Mike’s plans. This original masterwork now hangs proudly on the wall in the office- a rare gem in its own right, and one of the most prized possessions at Killer Paint.

We hope you enjoyed taking this peek at the Killer Paint shop. Let us know if there is anything you would like to see us post here in the future!


Kille Paint Spade Skull Emblem

Perhaps these projects gave you some ideas, or you already have an idea in mind for your own car, truck, motorcycle, refrigerator, etc?

If you would like to contact Killer Paint about working on your own project, visit our website, or contact us at info@killerpaint.com


Related Links:

The Original Killer Paint Facebook Page: https://www.facebook.com/pages/THE-Original-KILLER-PAINT-INC/297040465604

The Official Killer Paint Website: www.killerpaint.com

Killer Paint’s “True Fire™ Basics” Series: https://www.killerpaint.com/true-firetrade-basics

True Fire™ Instructional DVDs:
The Secrets of Airbrushing True Fire™ – Part 1
The Secrets of Airbrushing True Fire™ – Part 2

True Fire™ Freehand Templates: Artool Freehand Airbrush Templates, True Fire Template Set

Harley-Davidson Official Website: http://www.harley-davidson.com

House of Kolor Official Website: www.houseofkolor.com

In case you missed it, you can read True Fire™ Basics Part 1, “Know Your Fire,” on our website by clicking here.

For True Fire™ Basics Part 2, “What You Throw Down,” on our website, click here.

The information here is intended to help painters and artists get the best results they can when painting realistic fire on their own projects. For detailed instructions on painting realistic fire, we recommend that you watch The Secrets of Airbrushing True Fire™ – Part 1 DVD.

True Fire Custom Paint by Mike Lavallee of Killer Paint

When painting realistic fire, it is important to be able to balance the amount of airbrushing you do freehand, versus the amount done with a template or shield. To achieve believable looking flames, it is necessary to mix it up.


AngelHairFire01

You don’t want flames that look like this. Change it up and give your flames some movement and body

Give Fire Its Shape

If one tries to paint flames entirely freehand and without any templates whatsoever, the results tend to look less crisp, and lacking in fullness and excitement.

At worst, you can end up with what we sometimes call “angel hair” fire- which can look long and stringy, and have very little of the energy that gives fire its distinct character. Using a freehand shield helps add some definition and variation to your artwork.

Some people avoid using templates or freehand shields due to the cost, but investing in the right tools for the job can really make a difference in the final artwork you create. You may be surprised at the improvement.


Too Much of a Good Thing

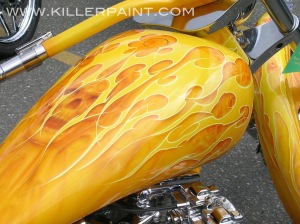
Tribal Flames on Motorcycle Tank

Solid flames are okay… just when you are doing a “tribal” design.

On the other hand, if one relies entirely on templates to build their fire, they are likely to have problems of a different sort.

Too much template usage can have the opposite effect- it gives the flames too much structure, and creating good fire in artwork requires striking a balance.

Overbuilt flames start to look abstracted or stylized, often looking more like layers of tribal blade designs than True Fire™. At the extreme, you can get what we often refer to as “Swiss cheese” fire- appearing like large blocks of fiery colors punctuated with many overly-defined holes in them.


Have a Target- Practice Hitting It

The key to solving both of these problems (and more) starts with something we’ve discussed before- Making sure you Know Your Fire.

True Fire™ Mailbox by Mike Lavallee of Killer Paint™Arm yourself with good reference photos and a studied knowledge of flames that look like the kind you would like to paint (remember, fire has a broad range of appearances.) Then you will be better able to strike a balance in your painting technique.

If necessary, practice on scrap panels, or smaller items like mailboxes, bicycle helmets, bowling pins or metal folding chairs, until you feel you have your technique down. Then you can move on to larger projects like motorcycles or cars.

You really don’t want to be working out the kinks in your airbrushing process on something expensive!  It’s just a recipe for disaster… Especially if you mess up on something that doesn’t belong to you.


Your Own Twist

Mother's Wax PT Cruiser by Mike Lavalle of Killer Paint

It should be noted that this all assumes that you are trying to paint truly realistic fire.

Sometimes stylizing your flames might be desired, depending on the circumstances. Make sure that is your goal from the beginning though, not the result of poor technique.

Some people have their own “brand” of fire, their personal style. If it works for them, more power to them. But if you are doing a job for a customer, make quite sure that they understand exactly what they should expect from you when you use the term “fire.”

We hope you found this information useful. We may have posts about airbrush art and painting True Fire™ in the future, so stay tuned! Thanks for visiting!


Click the corresponding link if you are interested in purchasing The Secrets of Airbrushing True Fire™ – Part 1and/or The Secrets of Airbrushing True Fire™ – Part 2

Artool’s True Fire™ Freehand Templates, used in painting realistic fire, can be purchased from Coast Airbrush here, and the “2nd Degree Burn” templates are here.

ShinyDimemsionalSpadeSkull

Let us know in the comments if you have any questions about reference materials for painting realistic fire, or share with us your favorite ways to gather images for inspiration in creating your artwork.

If you would like to contact Killer Paint about working on your project, visit our website, or contact us at info@killerpaint.com


Related Links:

True Fire™ Basics Part 1, “Know Your Fire”: https://www.killerpaint.com/true-firetrade-basics/category/basics-part-1

True Fire™ Basics Part 2, “What You Throw Down”: https://www.killerpaint.com/true-firetrade-basics/category/basics-part-2

True Fire™ Basics Part 4, “Square Pegs in Round Holes” https://www.killerpaint.com/true-firetrade-basics/category/basics-part-4

The Original Killer Paint Facebook Page: https://www.facebook.com/pages/THE-Original-KILLER-PAINT-INC/297040465604

The Killer Paint Website: www.killerpaint.com

True Fire™ Instructional DVDs:
The Secrets of Airbrushing True Fire™ – Part 1
The Secrets of Airbrushing True Fire™ – Part 2

True Fire™ Freehand Templates: Artool Freehand Airbrush Templates, True Fire Template Set

House of Kolor Official Website: http://www.houseofkolor.com/
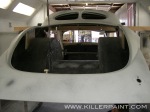
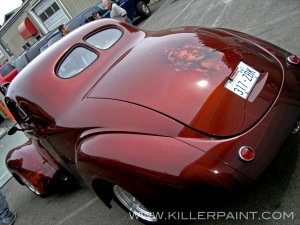
CIMG3868BA few years ago, customer Bill P. came to us about a car he was building. He had a fiberglass Willys coupe that he wanted to get painted, and he was looking for something away from the ordinary for this car. At the time it came to the shop, it was pretty much just a shell.

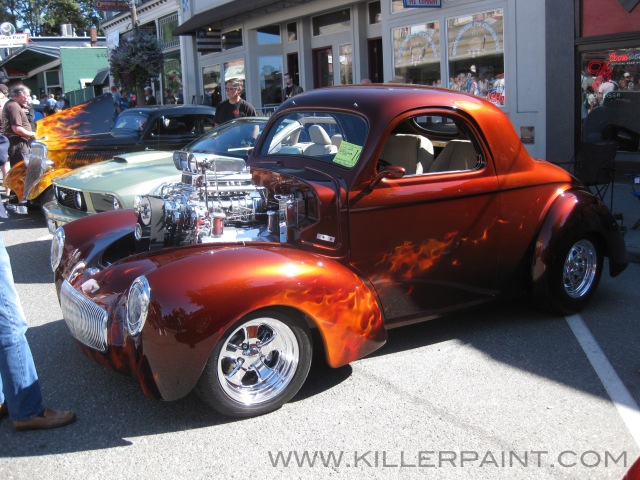
After discussing some options, Bill chose to go with some classic True Fire™  but wanted something unique for the base color to go with the flames.


Picture 174B

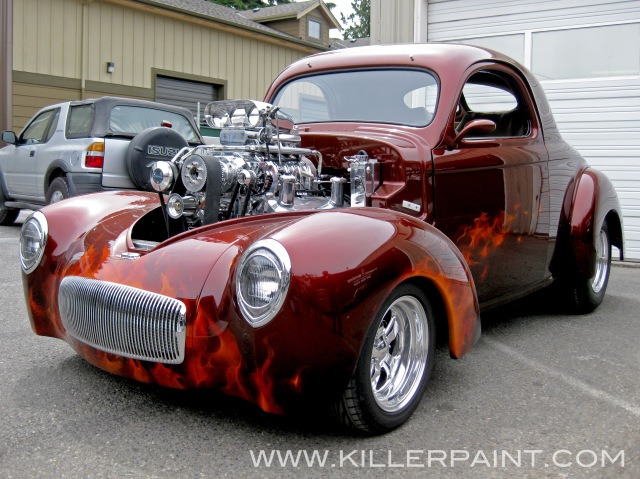
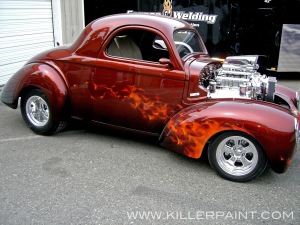
The base color for this car is a special recipe that Mike came up with for this project.  In a first for Killer Paint, our customer decided that he wanted a color that matched his wife’s hair. The final color is deep and rich, and has a warm glow to it, especially in the sunlight.

There is also a darker Root Beer candy fade along the bottom, for some additional character. Mike liked it so well, that he has has continued to use it on other projects as well. (See our post on the Cat’s Roar Magnum for the Big Cat Rescue organization)

CIMG4873B Picture 177B

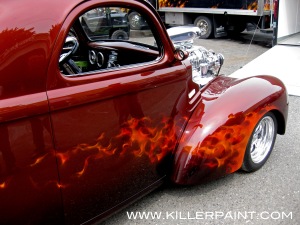
For the True Fire™ on this Willys, Mike went with the classic flame streak off of the wheel wells, which looks great on vintage hot rods.

The fire itself is toned down a bit, keeping to the reds and oranges, leaving out the bright yellows in order to better compliment the reddish-brown tones of the body color. There is a little bit of heat coming up off of the lower front end as well.

CIMG4878B Picture 195B

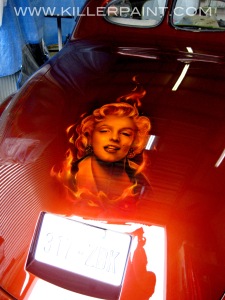
Bill’s wife is a fan of Marilyn Monroe, and collects Marilyn memorabilia. So for the trunk lid, Mike painted a portrait of the blonde bombshell in the same tones as the flames on the car.

Picture 543B

After it left Killer Paint, Bill continued on the build, and had it done in time to get his Willys into the lineup with some other cars painted at Killer Paint at the Annual Classic Car & Hot Rod Display in Snohomish that year as well.

We hope you enjoyed taking a look back at this project. Let us know if there is anything you would like to see us post here in the future!


ShinyDimemsionalSpadeSkull

Maybe this project gave you some ideas, or you already have an idea in mind for your own car, truck, motorcycle, refrigerator, etc.

If you would like to contact Killer Paint about working on your own project, visit our website, or contact us at info@killerpaint.com


Related Links:

The Original Killer Paint Facebook Page: https://www.facebook.com/pages/THE-Original-KILLER-PAINT-INC/297040465604

The Official Killer Paint Website: www.killerpaint.com

Snohomish Annual Classic Car & Hot Rod Display: http://www.cityofsnohomish.com/2014CDinfo.htm

House of Kolor Official Website: www.houseofkolor.com

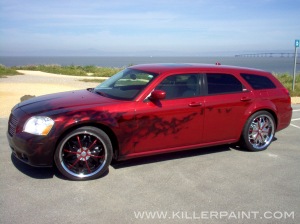
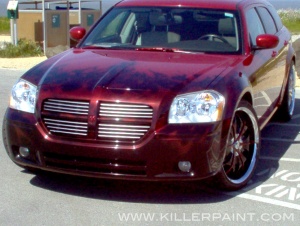
Back in 2011, former client John C. brought back a car that had been previously painted at Killer Paint. The 2005 Dodge Magnum, dubbed “Black Cherry.” This car was unique in that it was painted red, but with black true fire, when it is typically the other way around.

Black Cherry Magnum Driver's Side View- Killer Paint Black Cherry Magnum Front View- Killer Paint

This time though, he wanted to do the paint on this car entirely over for a good cause. Working with the Big Cat Rescue organization in Tampa, FL, the “Black Cherry” would be transformed into a tribute vehicle, bringing awareness to their cause:

31765“Big Cat Rescue, one of the world’s largest accredited sanctuaries for exotic cats, is a leading advocate in ending the abuse of captive big cats and saving wild cats from extinction.  We are home to about 80 lions, tigers, bobcats, cougars, servals and other species most of whom have been abandoned, abused, orphaned, saved from being turned into fur coats, or retired from performing acts” from bigcatrescue.org

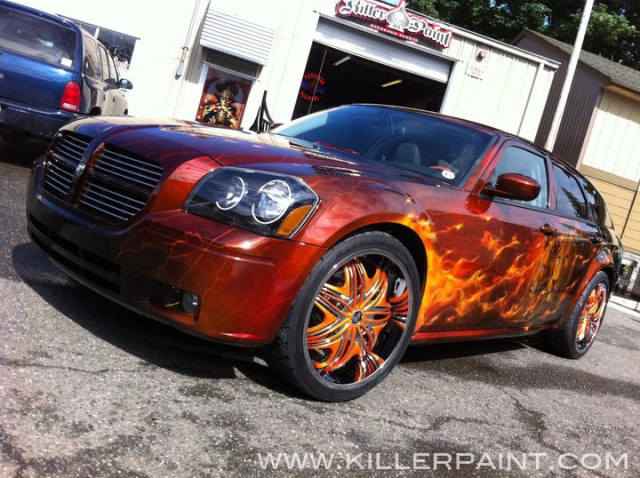
The Magnum was getting a bumper-to-bumper repaint. This time, the artwork would be much more ambitious, with cat portraits, texture effects, True Fire flames and more…

“Cat’s Roar” Magnum

The starting basecoat color is a favorite custom recipe of Mike’s, which is a deep, reddish-brown pearl. The paint gradually transitions darker and darker, all the way to black on the rear end. Mike used his Grunge FX™ spray mask to create multiple layers of subtle texture all over the car. He added multiple sets of cracks, with flames erupting from them in places. Larger True Fire™ flames roll off of the front wheel wells and down the sides, into the murals on the sides.

Cats Roar Magnum

IMG_1342BWhile the name Mike Lavallee is most often associated with the True Fire™ technique, not many people are aware that wildlife artwork has been one of his specialties for most of his career as an artist.

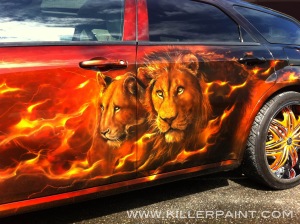
The driver’s side door murals are of Big Cat rescue residents Joseph the Lion and Sasha the Lioness sitting together, wreathed in the trailing flames from the front of the car. (click to enlarge)

IMG_1268B

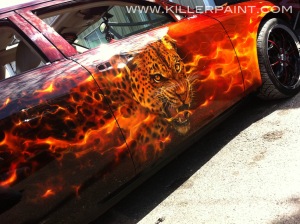
On the other side, also surrounded in flames, is the portrait of an intense, aggresive-looking Sundari the Leopard on the passenger-side doors.

Sundari is also a resident at the Big Cat Rescue habitat. This leopard’s spots gradually trail off along with the flames that weave in and out of them, and merge into the darker background color toward the back end of the car. (click to enlarge)

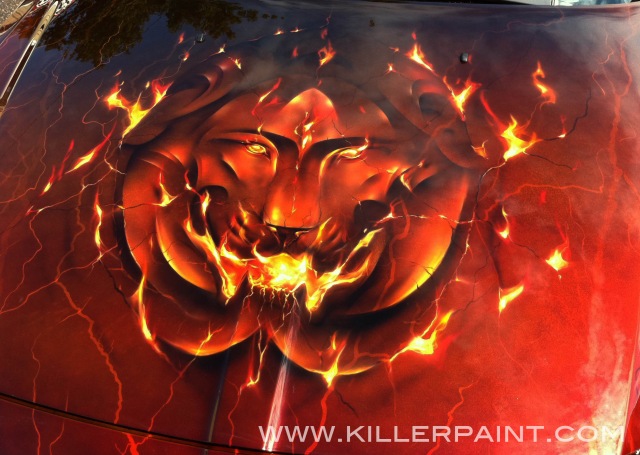
Prominently displayed on the hood is a stylized lion’s head, made to look like a stone sculpture. Flames roll out of its mouth and from the cracks in the background, creating something of a ring of fire around it.

IMG_1345B

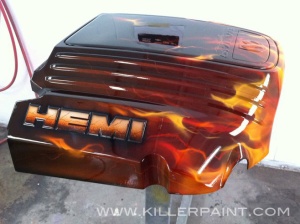
269906_10150298648130605_2548347_n2Under the hood, the engine cover got the custom treatment as well.

It got the same base pearl brown base coat and dark fade. Layered texture and cracks were added too, matching the color scheme on the exterior of this project.

True Fire™ flames were added, rolling off of the front edge, and the raised “HEMI” badges on either side got some extra shading and a faux stone texture with cracks to make them really stand out. (click to enlarge)

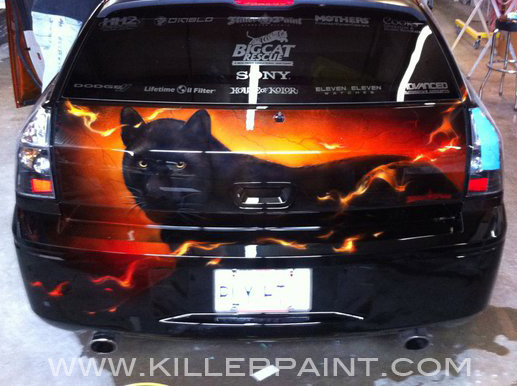
Finally, on the backside of this Magnum is a portrait of the black leopard Adonis, the last Big Cat Rescue animal pictured on this car. This guy has a rich golden glow behind him, to make sure he stands out from the dark background on the Magnum’s rear end.

268028_10150298646480605_593097_n2

This project wasn’t only about a body repaint, though. Many sponsors would contribute more modifications and upgrades once it left the shop here at Killer Paint. The Cat’s Roar sponsors logos were added to the rear window in metallic charcoal vinyl graphics.

The new Morpheus wheels from sponsor Diablo USA were sent to the shop here at Killer Paint though, so that they could a little extra custom touch before they were put on the newly rechristened car. The inserts were removed, and given a fade and Grunge FX™ treatment to match the body of the car.

264492_10150298643460605_3316971_n2270078_10150298644460605_3829133_n2

Once complete, it toured over 56 countries, and made a number of car show appearances, not least of which was its 2011 SEMA Show appearance in Las Vegas. The “Cat’s Roar” also won over seventeen 2011/2012 First Place or Best of Class awards along the way, including:

  • Awards
    Best paint, Show Stoppers, July 2011
    Best Paint and 2nd in class, Verizon Extreme Autofest, 2011
    Best Murals, Show Stoppers, 2011
    Fabulous Flames, Good Guys, 2011
    Best in Class, Monterey Bay Mopars, 2011
    Top 20, VIP Spring Fest 07, 2012

On August 17th, 2012, the car was put up for auction as part of the prestigious Mecum Muscle Cars & More Auction in Monterey, CA, with half of the proceeds donated back to the Big Cat Rescue organization. This Magnum was designated “Star” status, which meant its sale was broadcast live on Discovery’s Velocity Network.

We hope you enjoyed seeing the transformation of this Dodge Magnum from one custom to another. If there is anything you would like to see us post about here in the future, please let us know in the comments.


ShinyDimemsionalSpadeSkull

Maybe this project gave you some ideas, or you already have an idea in mind for your own car, truck, motorcycle, refrigerator, etc?

If you would like to contact Killer Paint about working on your own project, visit our website, or contact us at info@killerpaint.com


Related Links:

The Original Killer Paint Facebook Page: https://www.facebook.com/pages/THE-Original-KILLER-PAINT-INC/297040465604

The Official Killer Paint Website: www.killerpaint.com

Killer Paint’s “True Fire™ Basics” Blog Series: https://www.killerpaint.com/true-firetrade-basics

Killer Grunge FX™ Spray at Coast Airbrush: https://www.coastairbrush.com/products.asp?cat=789

True Fire™ Instructional DVDs:
The Secrets of Airbrushing True Fire™ – Part 1
The Secrets of Airbrushing True Fire™ – Part 2

Cat’s Roar Magnum Facebook Page: www.facebook.com/CatsRoarMagnum

Big Cat Rescue Website: http://bigcatrescue.org/
Big Cat Rescue on Facebook https://www.facebook.com/bigcatrescue

Auction feature page at Mecum (more photos): https://www.mecum.com/lot-detail/CA0812-134000/0/2005-Dodge-Magnum-Custom/Automatic/

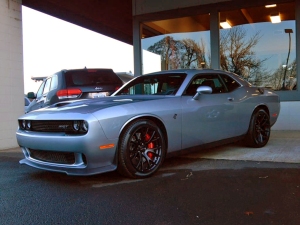
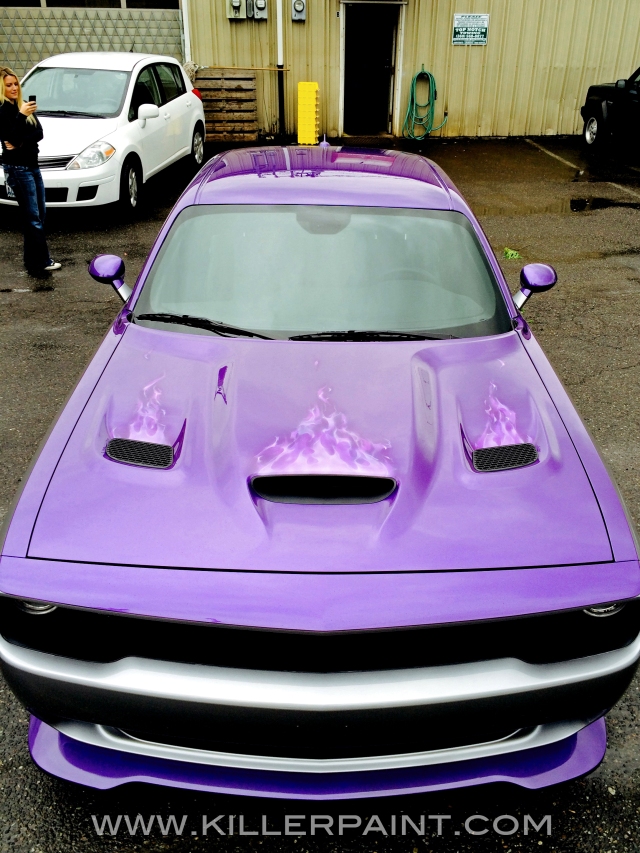
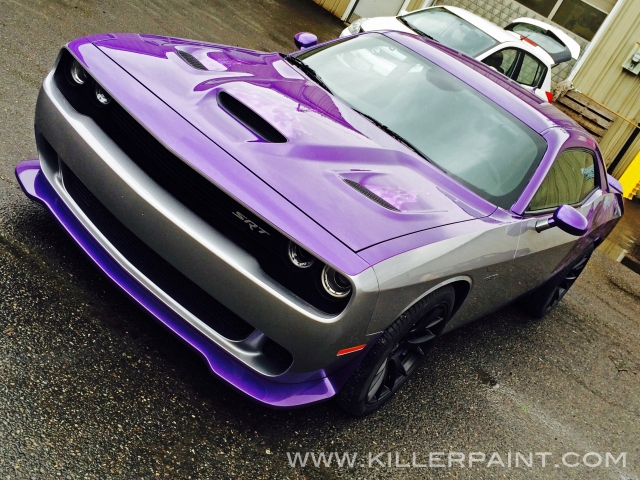
Earlier this year, Jim and Mary W. came to us about their stock silver 2015 Dodge Challenger SRT Hellcat. They wanted to put some classic Mopar “Plum Crazy” purple on the car.

image1BFullSizeRender-8B

Jim is a crab fisherman, and he was going to be away working during the project’s scheduled window. In fact, Jim had never even set eyes on this car before he had to depart to the north. It was up to his wife Mary to help coordinate getting the car to the Killer Paint shop, filling us in with what he wanted to do with the car, and making some other necessary arrangements.

FullSizeRender-6B

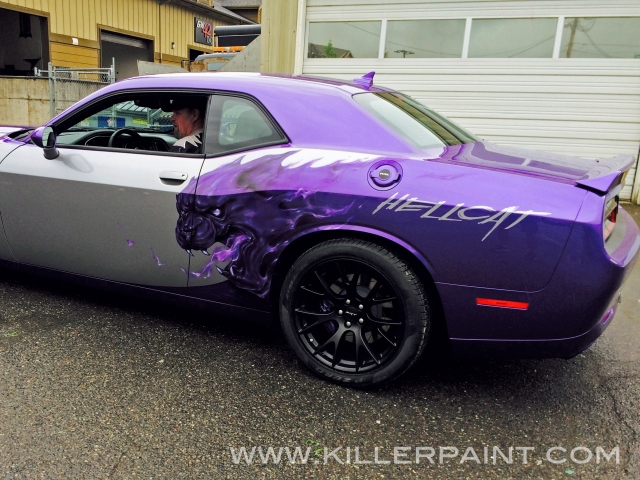
Mike wanted to give this car a design echoing that of some classic Challenger paint schemes, but kick it up a few notches from just a basic old-school design. The hood vents got some purple flames, and a stylized Hellcat emerges from the purple on the rear quarter panels and over the wheel wells. More purple flames adorn the cat. Custom “Hellcat” lettering sits on the rear fenders, in silver. FullSizeRender-22B

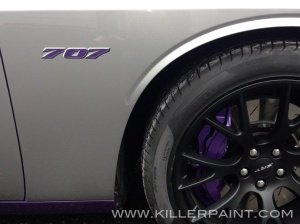
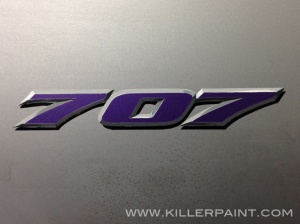
Jim wanted to replace the normal emblem behind the front wheel well with a “707” (yes, it’s a 707), which was painted in a faux-dimensional emblem style. Even the brake calipers got a coat of Plum Crazy.

IMG_0985B IMG_0857B

His first time seeing his car would be when they came to pick it up, after it was fully completed. The whole thing stayed under strict secrecy until then, as to not spoil the surprise for him when he finally got back home. When the time came at last, Jim and Mary came to the shop, and were able to view it, just as it was finished getting its final polish and wipe down.  Jim was overwhelmed to say the least.

FullSizeRender-13B

Then garage door was raised, and the car was rolled out for him to finally see in the full daylight. Well, more like somewhat overcast daylight. Can’t win the weather lottery every day. It is Washington State after all. See the original video here.

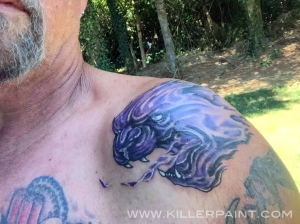
Jim loved his new car and the artwork that Mike did so much, he recently decided to make it a part of himself, also… with a matching tattoo.

11694868_10200549676302059_6758558540012525584_n2 18889_10200449701682756_1135830923077473561_n2

We hope you enjoyed taking a look back at this project. Let us know if there is anything you would like to see us post here in the future!


ShinyDimemsionalSpadeSkull

Maybe this project gave you some ideas, or you already have an idea in mind for your own car, truck, motorcycle, refrigerator, etc?

If you would like to contact Killer Paint about working on your own project, visit our website, or contact us at info@killerpaint.com


Related Links:

The Original Killer Paint Facebook Page: https://www.facebook.com/pages/THE-Original-KILLER-PAINT-INC/297040465604

The Official Killer Paint Website: www.killerpaint.com

Killer Paint’s “True Fire™ Basics” Blog Series: https://www.killerpaint.com/true-firetrade-basics

Killer Grunge FX™ Spray at Coast Airbrush: https://www.coastairbrush.com/products.asp?cat=789

True Fire™ Instructional DVDs:
The Secrets of Airbrushing True Fire™ – Part 1
The Secrets of Airbrushing True Fire™ – Part 2

Dodge Motor Company Official Website: www.dodge.com

This episode ( Season 4, Episode 2) aired on January 12, 2007.

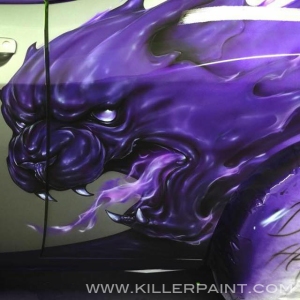
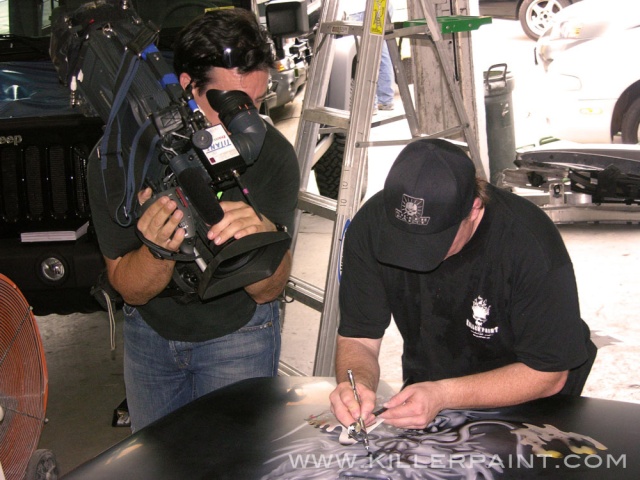
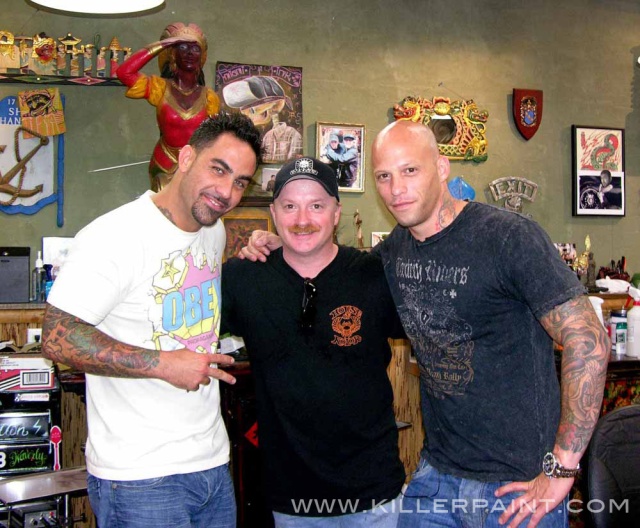
The tattoo artists from “Miami Ink” had seen Mike on other television shows. So when they got a new shop Jeep, they decided to call him in to paint artwork on the hood.

MIAMI_INK.JPG__2_B

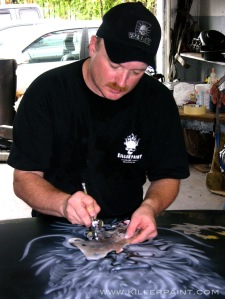
Doing paint work on a television show often means having someone looking over your shoulder while you work, and staying focused with the whole crew working around you the whole time.

MIAMI_INK.JPG__11_BMIAMI_INK.JPG__10_B

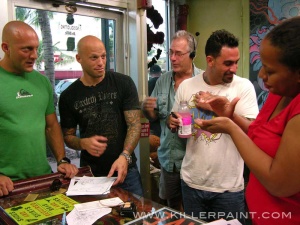
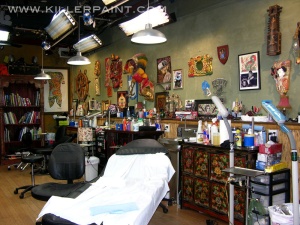
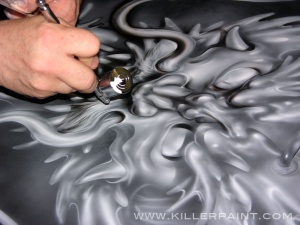
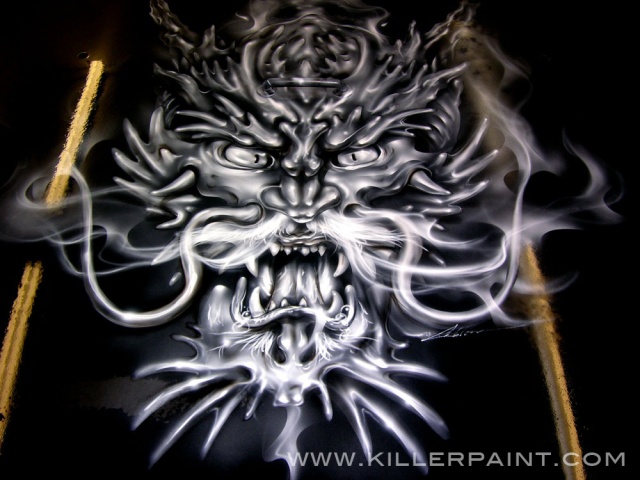
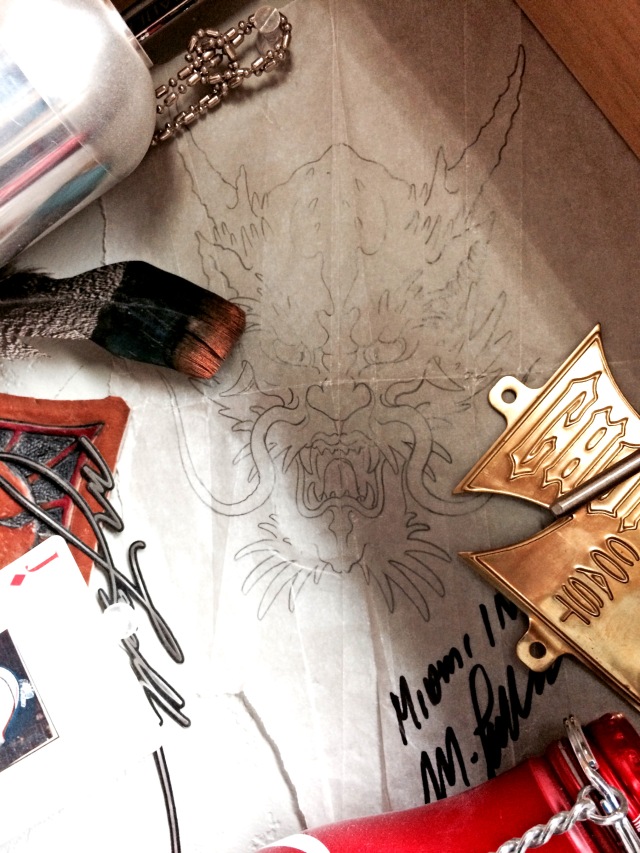
Mike got to see the tattoo gurus at their workplace, and artist Ami James came up with a Chinese Dragon sketch for the design for Mike to use on on the hood mural as soon as he got to painting.

MIAMI_INK.JPG__13_B

The hood for the Jeep was waiting for Mike to paint at a local body shop, just down the street from the Love Hate Tattoo shop.

MIAMI_INK.JPG__4_B MIAMI_INK2

The weather during the job was very humid, and extremely hot. But when there’s a job to do, and a limited window of time in which to do it, sweating it out is the only option to get it done.

MIAMI_INK.JPG__8_B

After the paint work was done, Mike got to keep the original concept sketch that Ami drew for the design, and as of this posting, he still has it on the wall above his desk at Killer Paint.

MiamiInkSketch

We hope you enjoyed taking a look back at this project. Let us know if there is anything you would like to see us post here in the future!


ShinyDimemsionalSpadeSkull

Maybe this project gave you some ideas, or you already have an idea in mind for your own car, truck, motorcycle, refrigerator, etc?

If you would like to contact Killer Paint about working on your own project, visit our website, or contact us at info@killerpaint.com


Related Links:

The Original Killer Paint Facebook Page: https://www.facebook.com/pages/THE-Original-KILLER-PAINT-INC/297040465604

The Official Killer Paint Website: www.killerpaint.com

Miami Ink on TLC: http://www.tlc.com/tv-shows/miami-ink/

Killer Paint’s “True Fire™ Basics” Blog Series: https://www.killerpaint.com/true-firetrade-basics

Killer Grunge FX™ Spray at Coast Airbrush: https://www.coastairbrush.com/products.asp?cat=789

True Fire™ Instructional DVDs:
The Secrets of Airbrushing True Fire™ – Part 1
The Secrets of Airbrushing True Fire™ – Part 2

Killer Paint on Pinterest: https://www.pinterest.com/killerpaint1033/